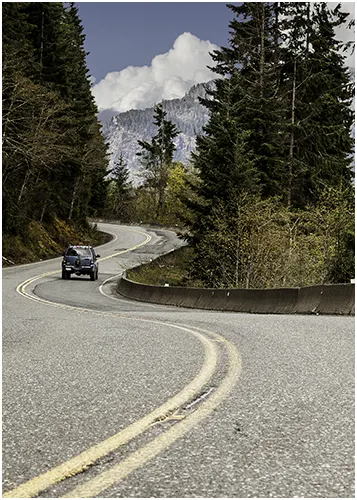
S Curve Photography: A Composition Technique for Photos
S curve photography is easy to practise here on Vancouver Island because the roads rarely

Show Mom Some Love For Less, Mothers Day Sale – 25% off
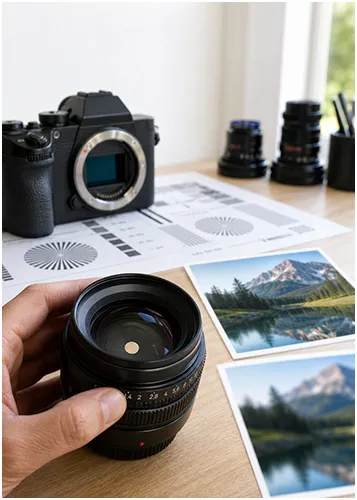
A soft photo can be frustrating when you feel like you did everything right. I’ve had images where the focus looked fine, but the lens didn’t give me the crisp detail I expected.
That is where understanding your lens sweet spot helps. A sweet spot is the aperture range where a lens gives its strongest overall sharpness. It is not always the widest aperture, and it is not always the smallest one.
I don’t use the sweet spot as a strict rule. I use it as a guide. In photography, sharpness matters, but so does depth of field, light, motion, subject choice, and creative intent. The goal is to understand how each of your lens performs so you can choose the right aperture for the photo you want to create.
Photos can look softer for different reasons depending on the aperture you choose.
At maximum aperture, the lens lets in the most light. That can help with low light, faster shutter speed, and background blur. The trade off is that optical flaws may be easier to see.
At minimal apertures, the problem is different. Diffraction spreads light as it passes through a tiny opening, which can reduce sharpness. More depth of field does not always mean more sharpness.
No, f/8 is not always the sharpest aperture.
The notion that f/8 is always the optimal aperture is a widely accepted guideline, but it is not a strict rule. Some lenses perform beautifully at f/8, while others reach their best sharpness earlier or later. A prime lens might be best at f/5.6. A zoom lens might be sharper at one aperture near 24mm and another aperture near 70mm.
Zoom lenses can behave differently depending on focal length, focus distance, and subject. Centre sharpness and corner sharpness may also peak at different settings.
That is why testing your gear matters. A general rule can help you start, but a lens test gives you better answers for your particular lens.
When I’m shooting landscapes, f/8 is my starting point. But if I need more depth of field from foreground to background, I may choose f/11. If I am indoors, f/8 may force a slower shutter speed or higher ISO. If I want background blur, f/8 is not where I want to be.
Aperture affects sharpness in several ways. By changing how much light reaches the sensor, how much of the scene appears in focus, and how the lens performs optically
| Aperture Range | What Usually Happens | Best Use | Main Trade Off |
|---|---|---|---|
| Widest aperture | More light, more blur, softer edges possible | Portraits, low light, shallow focus | Less depth of field |
| Middle apertures | Often the strongest overall sharpness | Travel, street, landscape photography, general photography | Less blur and less light than wide open |
| Small apertures | More depth of field | Macro, deep scenes, foreground-to-background focus | Diffraction can soften fine detail |
The key word here is “usually.” A new lens, an older lens, a prime lens, and a zoom lens can all behave differently. Sharpness also depends on focus accuracy, shutter speed, camera shake, ISO, subject movement, and technique. A lens can be set to its sharpest aperture and still produce a soft photo if the shutter is too slow or the focus misses
...Bob
The best way to find your perfect spot is to do a simple test. You don’t need a lab chart. You just need a steady setup, consistent light, and a subject.
To run a lens test:
Using a camera on a tripod removes camera shake from the test. You want to judge the lens, not your hand holding abilities.
When you compare the files, look beyond the centre of the frame. You may find that the centre becomes sharp before the edges do. You may also notice that the smallest apertures look less crisp, even though more of the scene appears in focus.
Test more than one subject when you can. Try a flat detailed surface, then try a real scene with depth. Lab-style sharpness and real-world usefulness do not always feel the same.
There are plenty of times when the technically sharpest aperture is not the best creative choice:
A photographer does not always need the technically sharpest file. Sometimes mood, motion, blur, or depth of field matters more.
Use your lens sweet spot when sharp detail is a priority and you have enough light to choose that aperture without hurting shutter speed or ISO.
Knowing your sweet spot:
If the scene calls for a different aperture, use that aperture! A good photo is not always the sharpest. The best setting is the one that gives you the right mix of sharpness, depth of field, light, motion, and feeling.
The lens sweet spot is useful because it shows where your lens tends to produce its strongest sharpness. It can help you avoid soft wide-open shots, understand diffraction, and make better choices with your camera.
Still, it is only one part of aperture choice. Test your own lens, learn its strong range, and treat that knowledge as a guide.
Sharpness helps most when it supports the photo, not when it controls it.
The aperture your lens is sharpest at depends on the lens, focal length, and scene. Test several apertures with your camera on a tripod, then compare centre, edge, and corner details at 100%.
No, f/8 is not always the sharpest aperture. Some lenses peak near f/5.6, others closer to f/8 or f/11, and zoom lenses can vary by focal length.
No, you should not always shoot at your lens sweet spot. Use it when sharpness is the goal, but choose other apertures when you need blur, low-light performance, more depth of field, or a specific creative effect.

S curve photography is easy to practise here on Vancouver Island because the roads rarely

I’ve found that perspective can entirely change how a photograph feels. In a landscape, moving

I’ve been to Lake Helen Mackenzie many times over the years. It’s a good option