
Photography as a Hobby for Beginners: Unlock Your Artistic Vision
Photography can be a fulfilling and enjoyable hobby that brings a creative outlet to your
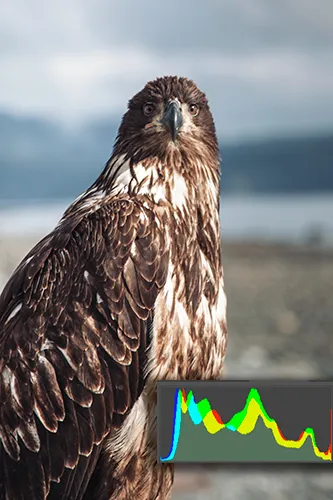

A histogram is a graphical representation of an image’s exposure and light levels and is important for photographers to identify clipping overexposure and underexposure. Your camera’s histogram allows you to make adjustments so the correct exposure can be achieved in any lighting condition. By using a histogram, we ensure our images are properly exposed and have maximum colour range.
A camera’s histogram informs of of the brightness, contrast, and colour of their photos. Photographers scan and monitor the histogram during post-processing to make sure we don’t clip the highlights and shadows.
The highlight alert function helps us to identify when an image is over- or underexposed. We depend heavily on the histogram when shooting in unpredictable lighting conditions like snow or stars. It helps us capture the dynamic light more accurately. Checking the histogram after each shot helps get the most out of their photos. AKA, this is also known as chimping.
By reviewing the histogram, we can gain insights into the exposure and tonal values of the photo. A histogram that looks balanced should not have any spikes touching the left or right edges. Histograms can also help us take aesthetically pleasing images of different styles.
Look at the curve of the graph. It provides insight into how accurately the tones have been represented. The curve should match the tone of the scene. If there is tapering or deviation from what you expect, detail may be lost.
The overall curve of the histogram in photography represents the range of exposures that the digital camera can capture. It is important to expose to the right of the graph. Therefore, you are not clipping the highlights.
It’s important to look at the ends of the histogram they show whether the image has any clipping. Which is a loss of information. Clipping occurs when parts of an image are too dark or too bright. Looking at the ends of the histogram helps pinpoint any potential problems with the exposure.
By examining the ends of the histogram, we ensure there is data.
Analyzing the colour channels of an image is important when interpreting a histogram, as it allows one to determine the distribution of colour in the image. By looking at the RGB histogram, one can identify areas of high or low colour intensity and adjust their photo accordingly.
Clipping occurs when the scene you’re trying to photography is too bright or dark, leading to a loss of detail. We need to be aware when reading the histogram and keep an eye out as this leads to a poor quality photo.
One way to reduce clipping is to use graduated neutral density filters or capture multiple bracketed shots and merge them in post-production.
Dynamic range is important, as it determines the number of tones in each section. Knowing the dynamic range helps to identify any potential clipping issues, allowing us to make adjustments in order to create a more balanced image. By understanding how many tones are available within each section of the histogram, we can better adjust the exposure for optimal results.
When we intentionally overexpose or underexpose a photo, we do it for a specific effect. Overexposure will cause highlights that are too bright and underexposure will cause detail in the shadows to be lost. By manipulating the exposure of a photo, we achieve various creative results and add depth to the photo.
Where might we underexpose? Think about photographing stars. Overexposure can be used when shooting waterfalls.
To set exposure using the histogram, ask yourself. Are you clipping the photo? Is it all the way to the left or right? Are you losing detail in the image? If so, can you adjust the ISO, aperture of shutter speed to correct the clipping?
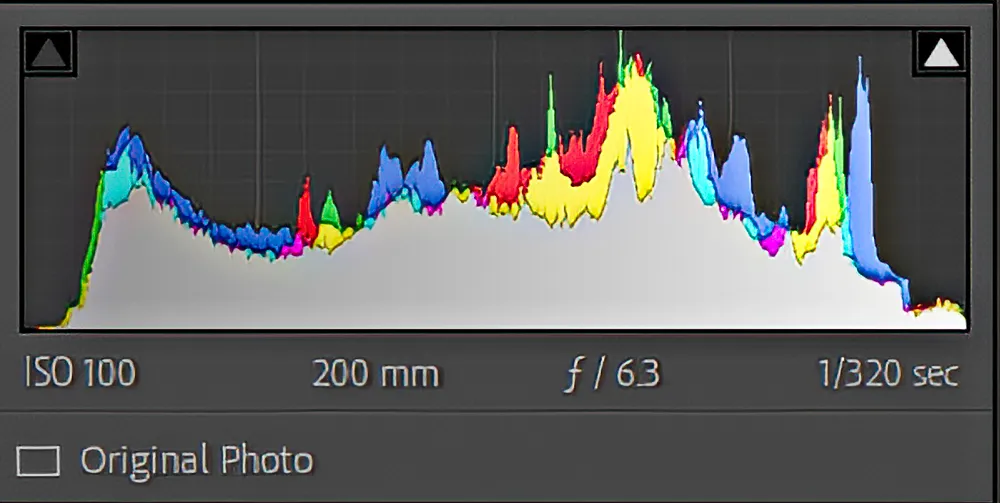
Histograms can be an invaluable tool. Through the use of histograms, we gain a better understanding and can ensure a correct expose.
They allow us to determine whether images are too light or too dark and how much detail is present in an image. Helping us decide if the exposure is suitable for the desired results and if any adjustments are required.
The histogram gives us better insight into how far we push without losing detail.
Photographers benefit from using the histogram on the back of the camera. It helps us quickly determine if the image is overexposed or underexposed.
It provides detailed information about the image, allowing us to make adjustments to the exposure.
By reading the histogram, we have more control over the outcome of the photo.
The importance of being able to recognize colours and tones in an image helps us fully comprehend how they are dispersed throughout a picture.
By understanding this information, we can make adjustments to the photographs, such as increasing or decreasing contrast, adjusting exposure levels and eliminating colour casts.
Furthermore, by knowing where specific colours are within an image, we have more control over colour saturation and can more accurately target areas for local adjustments.
A histogram is a graphical representation of the tonal values, colours, and brightness of an image.
Your RGB histogram shows the colour values for red, green and blue separately. By using the histogram, we can analyze for colour details and make adjustments as necessary. Insuring there are no clipped areas in the photo. Additionally, we can use the histogram to adjust contrast levels, increase saturation without losing detail in the image.
Shadow and highlight clipping occurs when the histogram is touching either side, resulting in a loss of detail. To identify shadow and highlight clipping, you can review your images with the histogram active in Lightroom, or your favourite photo editor.
Overexposure or underexposure can cause problems, but it can also be corrected by altering exposure settings in camera. Also, by using graduated neutral density filters or capturing multiple bracketed shots to merge later are two ways to avoid shadow and highlight clipping.
Yes! You can use the histogram to set the correct exposure when shooting. We can evaluate whether a shot is too dark or bright. The method allows us to make sure the photo has a correct exposure.
Dynamic range is important as it allows us to capture both the dark and light areas of a scene accurately. Shooting to the Left (to darker exposures) produces more distinct images with a wider dynamic range that are easier to edit.
Exposure to the right produces photographs with less noise, a wider dynamic range, a higher signal-to-noise ratio, and better colours, as long as the highlights are not clipped.
A histogram can identify the overall contrast of a photo. If there are more bars distributed across a wide range, this shows a lower level of contrast, whereas images with high-contrast will have fewer bars concentrated in certain areas and show few areas of lost detail.
We can use the histogram to determine the colour balance of the image. The histogram provides a graphical representation of tones and colours. As we make corrections the histogram updates in real time. It is an invaluable tool for any photographer looking to refine their skills with photo composition and exposure.
Tonal range of a photo is the variation in brightness values. Being able to identify the tonal range helps us adjust exposure settings. Understanding the tonal range can give insight into what lighting was used. Examining the histogram helps determine if there are any clipping issues that need to be corrected for optimal results.
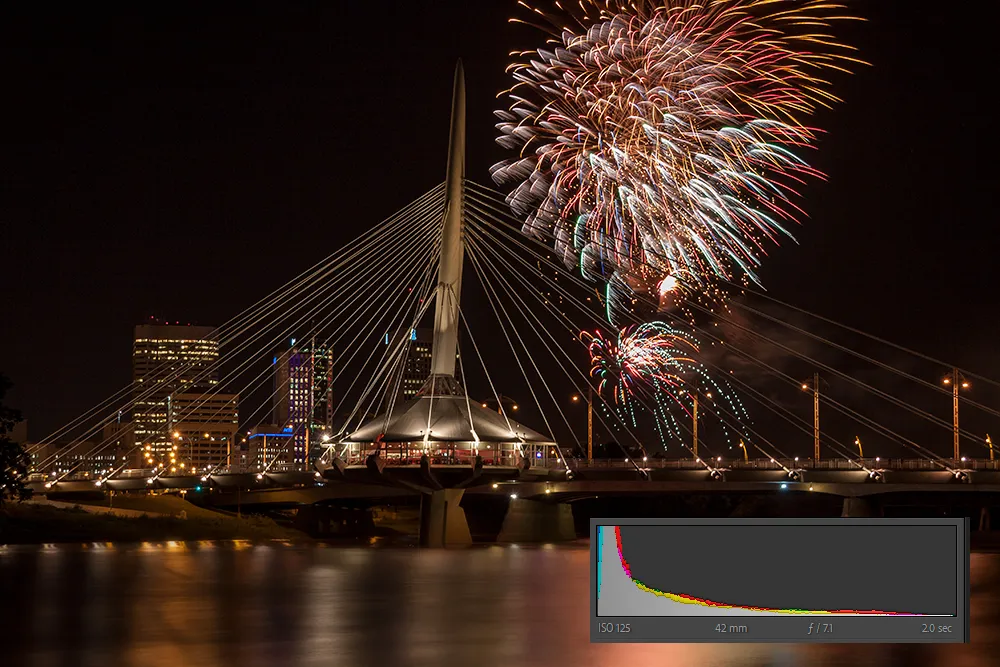
When using your histograms to capture photographs, it is important to understand the concept of shadow and highlight clipping. Clipping occurs when the histogram skews to the far right or left.
This can lead to a loss of detail. By preventing shadow and highlight clipping, we keep more detail in the photo.
Using a histogram to set exposure in camera helps ensure the image is balanced and well-exposed, with detail in all areas. The histogram divides the intensity of light into 5 equal parts, from the darkest to brightest, which allows us to adjust the exposure accordingly.
Histograms can measure the intensity of a light source and help us ensure areas are not clipped unnecessarily. By utilizing a histogram when setting exposure, we can create images with natural brightness that contain detail in all areas.
When capturing photos, it is important to know the dynamic range of a scene. Dynamic range is the ratio between the darkest and brightest tones in an image. Knowing this ratio allows photographers to adjust their cameras’ exposure settings and capture details in both bright and dark areas. Having a wide dynamic range makes it possible for us to take advantage of post-processing techniques such as tone mapping or colour grading, and bring out the finer details within an image’s shadows and highlights.
Exposing photos to the right on the histogram ensures that more distinct tonal values are captured, resulting in richer colours with less noise in brightly lit areas.
There may be time when we want to underexpose or overexpose in order to create a different, sometimes more desirable, photo.
Overexposure can produce an image with too much brightness and white, whereas underexposure can give the sensor more time to capture more details and richer colours. By checking the histogram before printing or posting to social media, we can check the desired results.
By setting the highlight alert in camera, we can monitor over exposures in real time. Insuring a correctly exposed photo for printing, online display, or other uses. Histograms also provide insight into where adjustments should be made in order to produce an image with the desired results.
By understanding the exposure triangle, we gain a better understanding of how to achieve proper exposure. We can also use it to manipulate our photos for creative purposes, such as creating dramatic compositions with high-contrast.
Knowing the basics of the exposure triangle is essential for consistent and great photographs.
Is the histogram the cat meow? No! The histogram is a graphical representation of exposure and helps determine the boundaries. It should not be relied on exclusively.
One shouldn’t always use the histogram to determine the exposure for a photo. The histogram is used to establish the limits of exposure.
For instance, if you try to photograph a snowy scene, the picture will probably be overexposed. Similar to underexposure will occur when shooting the stars or milky-way. The pixels are piled at the very left of the horizontal axis. For the best results, the shutter speed, aperture, and ISO must be adjusted appropriately based on the black-point, white-point, and center-point, respectively.
With regard to the histogram, you really need to understand clipping. Clipping occurs when the histogram reaches its limit and can no longer represent the tonal range within the picture.
In order to avoid clipping, you can adjust the camera shutter speed, ISO or aperture. If adjusting your setting doesn’t work or you’re not getting the desired results, try using a neutral density filter or capture several bracketed shots.
HDR and post-processing can help ease clipping. Shooting in RAW and using the exposure compensation settings on Camera can help as well. Finally, shooting in manual giving you full control can help.
A histogram is a graph that quantifies each tone’s frequency as a value on a bar chart to determine how bright an image is.
A histogram can process the lightest white ( far right) to the darkest blacks (far left), and the mid-tones. A histogram can accurately depict brightness values better than the human eye.
The perfect histogram is a graphical representation of the levels in an image that has a peak at all the mid-tone values, without clipping at either extreme. It allows photographers to adjust shadows and highlights without losing detail, which can be lost if the photo is underexposed.
Shadow clipping occurs when there are pure black area in your photo. It shows as a loss of tonal value to the far left of the histogram.
Shadow clipping can be prevented by making exposure adjustments to reduce contrast, such as increasing ISO selecting a smaller aperture size or slower shutter speed.
When shooting under harsh lighting conditions or mixed lighting, it is especially important to pay attention to shadow clipping and make sure that your exposure settings are adjusted accordingly in order to avoid any loss of detail.
Highlight clipping is a distortion of highlight details in an image caused by over-exposure issues. To prevent this, we use the histogram on the camera and make adjustments. Underexposure is preferable to overexposure since an overexposed photograph lacks detail.

Photography can be a fulfilling and enjoyable hobby that brings a creative outlet to your

Welcome to our guide to Photoshop tutorials for beginners: A Complete Beginner’s Tutorial for Learning
Creating stunning images is all about nailing the perfect colour grade. It’s what makes your