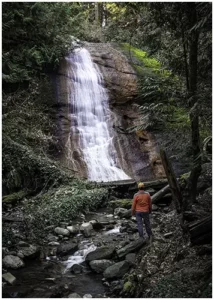
The Charming Northfield Falls in the Heart of Beach Estate Park
Looking to kill off an hour while in Nanaimo, BC? Just a short hop-skip and


Ready to dive into the magical world of taking macro shots? Discover how to illuminate your tiny subjects and transform your close-up shots from ordinary to extraordinary. Uncover the secrets behind creating stunning visual narratives with the interplay of a light source and shadows for shooting subjects. Even as a beginner photographer, you can quickly become a master of using Photography Lighting with a macro camera with simple yet powerful techniques. These methods will enable you to capture mesmerizing details that beautifully narrate enchanting stories of ambient light. Let’s unravel the mysteries of light together and shooting macro subjects to the next level!
For macro photographers, the role of lighting takes center stage. Lighting options play a crucial part in capturing the intricacies and beauty of miniature subjects. From natural to artificial techniques, understanding how to harness and manipulate light for macro is essential for creating stunning macro image.
In this guide to photo lighting, we will explore the best lighting techniques for macro photographs. We will uncover the secrets to illuminating your subjects in captivating ways. Get ready for capturing subjects that will elevate your photography in the depth of field to new heights.
The light around you plays a pivotal role in capturing the intricate details and essence of subjects. When it comes to this type of photography, every minute element counts and enough light serves as the brush that paints the scene.
It not only illuminates the subject but also brings out the light output on the following:
If not used properly, these all might go unnoticed. If you get the right amount of light and shadow, this interplay adds depth and dimension. This transforms a mundane macro shot into a captivating visual masterpiece. Light can also act as a storyteller, revealing the hidden beauty and intricacies of tiny subjects.
With the right direction of light, it has the power to emphasize the following:
By understanding how light looks with the subject, photographers can manipulate its qualities to create stunning compositions and evoke specific emotions. Macro photography lighting tips present a diverse range of lighting challenges. Get the light that requires photographers to use several techniques to achieve the best results.
Use natural light to produce breathtaking results. The best times of the day for capturing the enchanting qualities of nature such as light are during the golden hours. This continuous light source is daily around you, after sunrise or before sunset. Light from the sun plays a pivotal role in revealing intricate details, casting delicate shadows that add depth and dimension to the subjects captured up close.
During these moments, the sun as your light source is softer and more diffused, casting a warm and inviting quality of light that adds a touch of magic to your subjects. To make the most of this light, it’s important to have control over the strong light. This is where you should use a diffuser and reflectors.
Diffusers, such as translucent umbrellas or light panels, can soften and spread the sunlight, reducing harsh shadows and creating a more pleasing illumination for your macro shots. Use a reflector, and this angle of the light can bounce the sunlight back onto your subject, filling in any shadows and adding a touch of sparkle to the details.
When lighting macro subjects, positioning is paramount. Placing the light close to your subject and utilizing techniques like bounce light can yield captivating results. A tripod stabilizes the settings, preventing blurriness. Using continuous lighting offers flexibility, especially when working close to the subject. However, caution must prevail: light and too much light can overpower intricate details. By finding the right balance and experimenting with various approaches, you can master the art like macro photographers shoot.
If you’re looking to create striking and dramatic effects to create great macro photos, backlighting can be your secret weapon. You achieve this by positioning your subject between the light source and your camera. That way, you can capture mesmerizing scenes. The direction of the light seemingly dances through translucent petals or delicately outlines the fragile contours of a subject.
Backlighting adds depth and a sense of ethereal beauty to your shot, transforming them into captivating works of art. Silhouette techniques offer another creative avenue in macro photography. You can do this by deliberately underexposing your subject against a bright background. It allows you to create captivating silhouettes that convey a sense of mystery and intrigue.
Silhouettes can be particularly effective when shooting against a vibrant sunset. It can also work when capturing the intricate shapes of insects against a glowing sky. These photography tips on macro add an artistic touch to your images. As it leaves room for the viewer’s imagination to fill in the details.
The interplay of shutter speed and the type of light you can use greatly influences the outcome of your shot. Paying heed to the position and quality of the light is essential; whether harnessing the sun as your natural light source or employing a flash, the position dictates the play of shadows. A ring light allows you to use controlled, softer light, helpful for minimizing harsh effects when less light is available. Additionally, a well-managed flash system permits bouncing light onto your subject, adeptly adapting to various lighting conditions. Whether under the bright sunlight or utilizing a continuous source, mastering light’s nuances enhances the art of photography.
Shooting with macro in artificial ambiance using lighting equipment offers a wealth of possibilities to enhance your images. You can start by using an on-camera flash with careful positioning and diffusing. Another way is by exploring the creative freedom of off-camera flash head settingss with light modifiers.
These techniques empower you to shape and mold the lighting to capture the essence and beauty of your subjects. So, grab your gear, experiment, and let your imagination shine through your macro photography with the magic of artificial lighting.
The position of light becomes essential, and using a ring flash stands out as an effective option among various types of artificial light that you can use. The controlled and even illumination brought around by using artificial light is a valuable asset in capturing the finest details of your subjects.
On-camera flashlight on your subject is a popular option. This type of light can provide that extra burst to illuminate your subjects. However, to achieve optimal results, it’s essential to pay attention to the positioning and diffusion of the flash. Positioning the flash correctly is key to avoiding harsh shadows and achieving even lighting. It’s often recommended to use a dedicated macro flash unit, ring light, or LED lights that can be attached directly to your lens.
This can fill light to be evenly distributed around your subject, minimizing unflattering shadows. Experimenting with the angle and distance of the ring flash can also help you achieve the desired lighting effect. You can use mini softboxes or diffusers to soften the harsh lighting. These attachments spread much light more evenly. They also reduce the harshness of a direct flash and manage continuous light or a flash on shooting subjects.
For photographers seeking greater control over their lighting, off-camera flash offers a range of creative possibilities. Start by detaching the flash lighting settings from your camera and placing it strategically. With it, you can sculpt the lighting to suit your vision.
Using off-camera flash units in lighting is one way that opens up avenues for experimentation and fine-tuning. Position the flash at different angles and distances. You can create interesting:
You can use several accessories to modify the light further, such as:
This allows you to shape and control the quality and direction of the illumination. Off-camera flash settings and lighting setup provide the freedom to explore various lighting techniques. They help you achieve professional-grade results in macro photography. They enable you to:
The ability to manipulate the light to your advantage adds an extra dimension to your images. And this will elevate them from ordinary to extraordinary.
The position of the light for macro photography, as by now you may have understood, plays a paramount role in shaping the narrative of an image. The interplay of macro lighting and shadow can transform the ordinary into the extraordinary, as photographers meticulously craft their shots. With the right lighting tools and techniques, such as diffusers and reflectors, a macro lens becomes a magical portal, revealing intricate details previously unnoticed by the naked eye. Yet, a delicate balance must be struck, for excessive light can obscure nuances and overpower the subject. Ultimately, in skilled hands, lighting becomes the paintbrush that delicately strokes life into their subjects, creating captivating visuals that linger in the mind’s eye.
For macro photography lighting, use diffused natural light or soft artificial sources. Position the light at a slight angle to reduce shadows. Experiment with reflectors or diffusers for optimal results.
The ideal macro photography lighting setup involves diffused natural light or a softbox to minimize harsh shadows and highlight details. Use reflectors for fill light, and consider LED ring lights for even illumination of small subjects. Experiment to find your perfect balance.
Yes, a ring light is often essential for macro photography. It provides even and shadow-free lighting, highlighting tiny details in your close-up shots.

Looking to kill off an hour while in Nanaimo, BC? Just a short hop-skip and

Photography can be a fulfilling and enjoyable hobby that brings a creative outlet to your

Welcome to our guide to Photoshop tutorials for beginners: A Complete Beginner’s Tutorial for Learning