Mastering Aspect Ratio in Photography: An Essential Guide for Beginners
Aspect ratio in photography helps shape 80% of the images we remember. This paves the


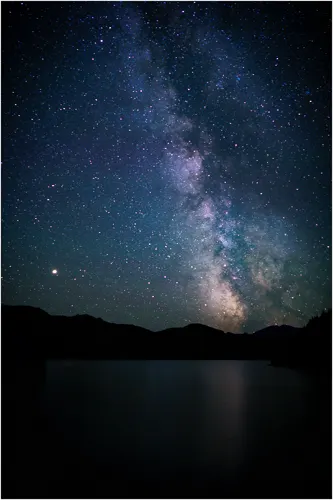
Ready to unlock the secrets of photographing the night sky? Say goodbye to blurry stars and hello to captivating celestial images with the ‘Rule of 500 for Photography.’ Unlike the ‘Rule of Thirds,’ this is one rule you’ll want to follow closely. In simple terms, this technique helps you determine the perfect exposure time for capturing stunning night sky photographs. Our guide will provide you with invaluable insights and expert tips on camera settings to capture stunning images of the night sky and it’s stars. Get ready to unleash your creativity and take your nocturnal photography to new heights with the ‘Rule of 500’!
The Rule of 500 applies when photographing the night sky. Because of the earth’s rotation, stars appear as streaks in shooting long exposures. By limiting the exposure time, you can capture tack sharp stars and avoid streaks. Unless you are trying photography star-scapes
The Rule of 500 is a simple formula used to determine the maximum exposure time for capturing sharp stars without star trails. It is calculated by dividing 500 by the focal length of your lens. For example, if you are using a 50mm lens, your maximum exposure time would be 10 seconds (500/50=10).
Knowing the Rule of 500 allows you to capture better night photos without the frustration of blurry or streaky stars.
There are lots of smartphone apps to help you calculate the rule of 500. Pluto Trigger, and PhotoPills
Using the Rule is simple and straightforward. Here is a step-by-step guide to using the Rule of 500:
When choosing the right lens and focal length, it’s important to consider the field of view you want to capture. A wider lens will capture more of the sky, while a longer lens will zoom in on specific stars or constellations. Making the Rule of 500 even more important.
In addition to the Rule of 500, there are other settings to consider for night photography. Here are my recommended settings:
Capturing stunning night photos requires more than just camera settings. Here are some tips to help you get the most out of your night photography:
Achieving precise focus is essential for photographing the night sky. Here are the two techniques that I rely on to get those tack sharp awe-inspiring photos.
One of the simplest ways to focus your camera for star photography is by utilizing the infinity mark on your lens. This mark (∞) represents the point of focus where distant objects, like stars, appear sharp. To capture breathtaking starry scenes, simply switch your lens to manual focus and align the infinity mark with the focus indicator. This will allow you to achieve the perfect focus for your photographs.
*Pro Note*
This is true almost all the time, however, it’s not perfect. I had a Canon where the perfect focus point was just before infinity. I wasted an entire night on a time-lapse that was completely out of focus.
Another effective technique involves using a flashlight to illuminate a distant object. By placing the flashlight on the object and manually focusing your camera on it, you ensure accurate focus for capturing sharp stars. Once focused, switch your lens to manual focus mode to lock in the setting before removing the flashlight. This technique works exceptionally well when shooting in dark environments where the stars may not provide enough contrast for autofocus to work effectively.
Even with the right settings and techniques, there are common mistakes to avoid in night photography. Here are some to watch out for:
As a passionate photographer, understanding the differences between a full-frame camera and a crop sensor is key to capturing stunning night sky photos.
Applying the Rule of 500 changes with the different size sensors. A full-frame camera and lens has a wider field of view and better low-light capabilities, allowing us to use longer exposure times while maintaining the desired level of detail and minimizing star trails. With a crop sensor, you need to use a shorter exposure time to avoid blurry pictures.
| Sensor Type | Formula | Example Calculation |
| Full – Frame | Exposure Time (s) = 500 / Focal Length (mm) | Exposure Time (s) = 500 / 24mm = 20 |
| Crop Sensor Camera | Exposure Time (s) = 500 / (Crop Factor * Focal Length) | Assuming a crop factor of 1.5: Exposure Time (s) = 500 / (1.5 * 24) = 6.5 |
| 3/4 Sensor | Exposure Time (s) = 500 / (0.75 * Focal Length) | Exposure Time (s) = 500 / (0.75 * 24) = 5 |
Your camera sensor size plays a role when using the Rule. While a full-frame camera offers advantages in terms of low-light performance and wider field of view, a crop sensor provides extra reach. Knowing these differences helps us take better pictures of the night sky using this technique.
In conclusion, the Rule is a simple yet powerful tool for capturing stunning stars at night. By understanding how it works and how to use it, you can optimize your camera settings and avoid common mistakes. Remember to experiment with different settings and techniques, and don’t be afraid to try new things. With practice and patience, you can capture breathtaking night photos that will amaze and inspire.
The Rule of 500 is a helpful guideline in night photography. By dividing 500 by the focal length of your lens, it suggests the maximum exposure time to avoid star trails. It ensures sharper images of the night sky and enhances the quality of your night photography.
For night photography, opt for a fast lens with a wide maximum aperture, such as a prime lens with a low f-stop (e.g., f/2.8 or lower). This allows more light to reach the camera sensor, enabling better exposure and the ability to capture stunning night scenes with minimal noise. However, this doesn’t mean you can’t use an F/4 lens. Your ISO setting will not be as low.
The 500 rule for a 50mm lens states that to avoid star trails, the maximum exposure time should be around 10 seconds (500 divided by 50). This helps capture sharp and detailed images of the night sky in astrophotography.

Aspect ratio in photography helps shape 80% of the images we remember. This paves the

Are you curious about the importance of ISO in photography? Dive into the fascinating realm

In photography, light and shadow are essential for creating captivating photos. It’s important to grasp