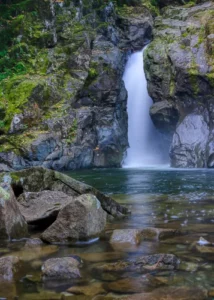
Medicine Bowls Courtenay: Waterfalls, Swimming & Access
The first time I went to the Medicine Bowls in Courtenay, it felt like a
Share the Love This Valentine’s Day – 25% Off

As a passionate waterfall photographer, I’ve discovered that exposure time and amount of light, be it bright sunlight or deep rainforest shade, significantly influences how you approach waterfall photography and your camera settings. My time here on Vancouver Island has taught me to always be ready to adapt my ISO, shutter speed, and filters to perfectly capture that silky flow against the wet, vibrant greens.
We’ll explore the differences between daylight and low-light scenes, showing how mastering waterfall photography camera settings for sunlight vs. shade will help you move from guesswork to intent.
Light always affects how we approach photographing a waterfall. Here on Vancouver Island, we are surrounded by rain forests and skies that change often. So, I’m always ready to adjust my camera settings while out shooting.
It might not be clear, but sunlight on a clear day can cause “hot spots” or “blown-out highlights” on flowing water and dark shadows in the surrounding foliage, making it difficult for the camera to capture detail across the entire scene.
Plus, you often need to use a Neutral Density (ND) filter to achieve a slow enough shutter speed. Seek shade, wait for clouds, or angle your shot to avoid harsh light. Bracketing frames sometimes helps capture both spray highlights and deep greens.

Looking to stretch your budget? We’ve got good news! Save an additional 10% use code bwild10
"You shape water with your shutter and protect detail with a careful exposure." Meaning your shutter speed is the creative control: a slow speed creates a silky blur, while a fast speed freezes the water's showing power.
....Bob
For a smooth, silky look, start around 1/4 s and stretch to multi-second exposures if needed. To freeze powerful flow, choose 1/125–1/500 s. Test, review, and nudge the shutter until the balance feels right for your scene and light.
I often take several photos at different shutter settings to freeze the trees or bushes that are blowing in the wind. Afterward, merge them into a single photo.
....Bob
Use f/8–f/16 for front-to-back sharpness and clean micro-contrast. Stop down more only when you must, since diffraction can soften fine detail. With near-far compositions on wide lenses, even f/22 may not render total depth, so shift focus carefully and check edges.
Begin at your base ISO (100-200) to maximize quality and lengthen the shutter. Raise your ISO only when wind shakes leaves or when you need a crisper, faster frame on large falls. Each stop of ISO shortens the shutter by a stop, so calculate the trade-off before you commit.
Oftentimes dark rocks and forests can trick your meter into overexposure. Monitor the histogram and apply a slight negative compensation to preserve the water details. This helps you master waterfalls in varying light conditions and capture water without blowing the highlights at the bottom of the falls.
| Scenario | Settings | Why It Works | Notes |
|---|---|---|---|
| Silky flow, moderate volume | ISO 200 • f/16 • 1/15 s | Creates soft motion while keeping rock texture | Good starting point for best camera settings for waterfall photography |
| Freeze big, bright falls | ISO 800 • f/11 • 1/160 s | Holds highlight detail and structure in heavy flow | Use exposure adjustment if foam nears clipping |
| Windy scene with foliage | ISO 400 • f/8 • 1/80 s | Shorter shutter reduces leaf blur | Balance against water texture; consider faster if gusts rise |
| Photographing waterfalls in low light | ISO 100 • f/11 • 0.8 s | Long exposure enhances flow without high noise | Check histogram; slight underexposure protects highlights |
| Best daylight settings waterfalls | ISO 100 • f/16 • 1/60 s | Controls brightness and maintains usable texture in sun | Adjust shutter in 1/3-stop steps to fine-tune detail |
Work methodically: set aperture for depth, lock ISO at base, then dial the shutter for motion, then confirm with the histogram.
....Bob
For shaded waterfalls, you have excellent control over your exposure. Start with a low ISO of 100-200 and an aperture between f/8 and f/16 for good depth of field. This allows you to then precisely adjust your shutter speed in the 1/8 to 1 second range to achieve the desired silky water effect. To further enhance your shot, use a circular polarizer to minimize glare and reflections, enriching the colours of the rocks and foliage.
Keep in mind that even in dim ravines, wind can cause blurred leaves with slow shutter speeds. If this occurs, briefly raise your ISO to use a faster shutter speed for a sharp shot of the background, and then take a separate, slower shutter speed frame for the silky water. You can then blend these images later. Remember to bracket your shots to capture detail in both the bright water and the darker forest.
Shooting waterfalls in bright sunlight requires careful attention to avoid losing detail in the highlights and shadows. The goal is to minimize mixed lighting (bright water and dark rocks).
If the sun is unavoidable:

Looking to stretch your budget? We’ve got good news! Use the SPECIAL code whosaid15 for an extra 5% off
Be ready for the light and spray you’ll face. These tips help you adapt quickly. They keep water and rock details sharp. You also control motion, colour, and reflections with the right camera settings.
I can’t stress this enough: get a good, solid tripod. Furthermore, when using the tripod, always start at the bottom with the thicker leg sections, then lock everything. Use your camera bag as an extra weight to plant your tripod even firmer, if possible, at the centre post.
Use a remote release or self-timer to avoid shaking.
If and when wind hits, raise ISO slightly. Keep your shutter near 1/4 s to tame motion. This balances sharp surroundings with soft water for clean results.
A circular polarizer cuts the glare on wet rocks and foliage. Rotate it until reflections fade, then fine-tune for texture. Colours deepen, and you often gain 1–2 stops for a slower shutter. For a review of why you should use a polariser, check out our post here.
Neutral density filters reduce light for those longer exposures. An ND 0.3 cuts about 1 stop, while an ND 1.8 cuts roughly 6 stops. Yes we written an article on how to use ND Filters read the post is here
On bright days, stack a polarizer with an ND to remove highlights. Seek natural shade from cliffs or cedars to calm contrast.
If light is patchy, bracket exposures and plan to blend in post-production. You can also step back with a telephoto to frame shaded sections. This is a smart move for sunny and shady areas.
Mist builds fast. Use a rain cover or a simple plastic sleeve. Carry several microfiber cloths to wipe the front element between shots. Face the lens down when you move, then check for droplets before each exposure, especially when using slower shutter speeds.

Slow down to build stronger frames. Spend 30–60 minutes scouting angles and watching water flow patterns at different times of day. This helps stultify your experience in different light conditions.
Use foreground rocks and mini-falls to guide the viewer’s eye. Keep lines clean and the horizon level; if need be, tilt the camera. Most modern-day cameras have a horizon level; I know I use mine all the time.
Early light is soft and even; it’s my preferred time. Mist hangs longer at dawn, and crowds are rare. This time of day allows you to take your time and play with your settings.
Work the pool and outflow for subtle ripples. If a big fall turns to featureless cotton, increase shutter speed to keep structure.
Bright foam and dark cedar groves rarely fit one exposure. Bracket for highlights and shadows, then blend later in post is something I often have to do.
Even at one shutter speed, each exposure can draw a new pattern in the flow. Fire a short sequence and pick the frame with the most graceful streaks. Or merge a few for richer texture.
On gusty days, time shots between wind pulses. If motion remains messy, anchor your scene with a stable rock or log. Let the water provide the rhythm.
Your best waterfall photos come from matching settings to the available light, and water flow. Start with lowest ISO and f/8–f/16. Then, adjust shutter speed for the effect you want.
For silky water, use 1/4 s to 1 seconds. For holding texture, try 1/125–1/500s. Use a histogram to check exposure and slightly underexpose to protect highlights.
Under clouds, rain, or shade, a polarizer enhances colour and slows the shutter. In bright sun, use ND filters and look for even light. Bracket shots when contrast is high.
A solid tripod is essential. These habits help adjust settings for different lighting quickly.
Composition is key. Use foreground rocks, mini cascades, and leading lines to frame your shots. Shoot early or during overcast for rich tones and details.
Capture multiple frames to manage wind and vary water patterns. Blend exposures for highlight and shadow control using different shutter speeds. Combine frames at different ISOs to steady leaves and keep water silky.

To shoot a waterfall in daylight, use a small aperture (f/11–f/16), a low ISO, and a neutral density (ND) filter to slow the shutter speed. This helps capture the silky water effect while preventing overexposure from bright daylight.
The best camera settings for waterfalls are a slow shutter speed (1/4–2 seconds), low ISO (100–200), and a small aperture (f/8–f/16). Use a tripod and ND filter to avoid blur and capture the smooth, flowing water effect.
The first time I went to the Medicine Bowls in Courtenay, it felt like a
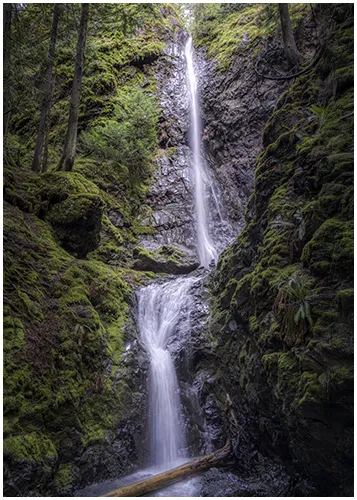
Lower Myra Falls is one of those places in Strathcona Park that feels far more
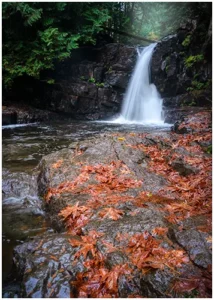
As a landscape photographer, I often find that waterfalls wrapped in mist and fog are