ON1 Effects Review for Photographers | Tools, AI & Workflow
Did you know that more than 70% of photographers believe that editing software is essential
Grand Opening & Black Friday Sale = 50% Off

Curious about the Nik Collection for Lightroom? Whether you’re a pro or just love snapping pics, you’ll discover how to make those touch-ups faster and more creative.
Check out what the Nik can do for you. For a closer look at what it offers and its price tag, take a peek at our review. You can also try before you buy with our free download section.
So you’re tinkering with Lightroom, and you want to take photo editing to the next level? Enter, the Nik Collection. It’s a cool bunch of tools that can level up your photography, and it integrates seamlessly with Lightroom to bring that razzle-dazzle to your pics.
Nik is like a Swiss Army knife for photo editing, except less intimidating and way more fun. Here’s a quick peek at what each feature brings to the your editing.
These tools are highly effective, ranging from basic tasks to producing artistic masterpieces.
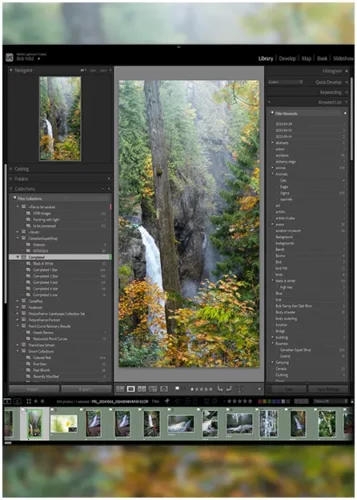
Are you prepared to integrate the Nik into your Lightroom setup? Here’s the scoop:
That’s it! You’re all set up to take those editing skills up a notch right from Lightroom.
When you fire up the plugin, you’ll find some nifty updates to boost your editing prowess:
By knowing the ins and outs you’re on track to tame those photos like a pro.
Jumping into Nik is like giving your photo editing a turbo boost. Follow this down-to-earth guide to get the most out of it, especially when fiddling with Nik Colour Efex and cranking up things with Nik Viveza.
Nik Viveza is like a magnifying glass for detail, zooming in on the bits that matter.
Viveza’s specialty is those little tweaks, making it perfect for brightening portraits or polishing those sunset snaps.
Don’t be shy about popping over to our Nik Collection tutorials for more tips or glitch fixes at the Nik Collection troubleshooting spot if you hit a snag while getting the software to play nice.
Looking to stretch your budget? We’ve got good news! Use the SPECIAL code whosaid15 for an extra 5% off
I will admit that Nik Silver Efex is my favourite tool within the collection. Let’s turn your colour photos into stunning black and whites.
One big perk of using Nik Silver Efex in Lightroom is how it morphs regular colour photos into eye-catching black and white wonders.
Here’s the nitty-gritty of some standout features:
With these tools in your back pocket, shaping images to match your artistic flair becomes a breeze.
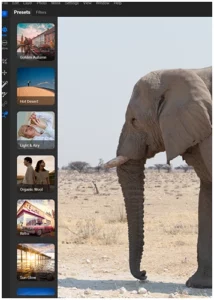
These presets are perfect launchpads for your projects and can be tailored to meet your style groove.
Here’s a peek at some presets you might dig:
Using these filters means you can crank out top-notch black and white photos faster, and you’re free to whip up your own custom presets for a consistent flair across your work.
Nik HDR Efex works right in Lightroom to make those high dynamic range (HDR) images. Think of it as a way to snap a bunch of photos at different brightness levels and combine them into one fantastic pic that’s got it all, bright skies and shadowy nooks. It’s super handy when the lighting’s being all tricky. Your pics can end up more poppin’ and match what your eyeballs catch in real life.
Here’s a breaking down the main HDR Efex tricks:

The Nik Collection gives you some pretty neat tools to up your photography game! Two popular tools are Nik Define and Nik Sharpener. They’re like the dynamic duo for fixing your pictures in Lightroom.
Nik Dfine is your go-to for scrubbing out noise from your photos. You know, that pesky grain that makes everything look fuzzy. It’s got some slick tech that gets rid of the noise but keeps all the details.
Key Features of Nik Dfine:
| Features | Description |
|---|---|
| U Point Technology | You can zero in on specific spots to tone down the noise, without messing up the whole picture. |
| Control Over Reduction Levels | Slide those bars up or down to dial in how much noise to zap away, whether it's the brightness or color noise. |
| Batch Processing | Tackle a bunch of photos at once, which shaves off loads of editing time. |
Nik Dfine slides into Lightroom like it was meant to be there. Just hit it up from the Photo menu. It’s a lifesaver for those low-light shots or high ISO scenes where noise tends to creep in.
...Bob
Nik Sharpener is all about making your photos pop. It’s like giving your images a shot of adrenaline.
Key Features of Nik sharpener:
| Features | Description |
|---|---|
| Various Sharpening Algorithms | Different strokes for different folks—tailors the sharpness depending on whether it's going on a screen or paper. |
| Fine-tuning Options | You've got control to adjust how sharp or how soft you want those details to be. |
| Preserving Detail | Brings out the edges without turning your photos into pixel land, keeping everything looking real. |
When you mix Nik Sharpener into your Lightroom routine, your pictures will have that extra "wow" factor, catching eyes whether they're on a screen or in someone's hands.
...Bob
If you’re a photographer aiming to step up your editing game, Nik’s Collection could be your new best buddy. This toolbox is packed with shiny, new gadgets for boosting your photos. It’s got professional tools yet is user-friendly enough for newbies to try.
Let’s talk about what’s in the box with Nik collection. It’s like opening a treasure chest of photography goodies.
| Features | Description |
|---|---|
| Speedy Gonzalez | Your images zoom open faster, and moving between plug-ins feels like a breeze (Nik Collection by DxO). |
| Boosted Nik Color Efex | More filters, more fun; adds pizzazz with features like HSL stacking (Nik Collection by DxO). |
| U Point™ Local Tinkering | Handy tools for those precise tweaks, making photo perfection possible. |
| Hush the Noise | Say goodbye to grainy images without losing the quality. |
| Bye-bye Subscription Fees | Buy it once and you’re good to go on up to three computers (DxO). |
These nifty tools give photographers what they need to boost their editing and produce jaw-dropping photos.
The Nik Collection is a powerful upgrade for anyone using Lightroom, whether you’re a beginner or a seasoned photographer. With tools that handle everything from colour corrections to noise reduction and black-and-white magic, it brings a creative boost to your workflow.
It’s easy to install, fun to explore, and helps make your photos stand out without needing a monthly subscription. If you’re looking to push your photo edits further while keeping things simple, the Nik Collection is definitely worth a try.

Did you know that more than 70% of photographers believe that editing software is essential

Long Beach is one of those places I keep coming back to, even when I
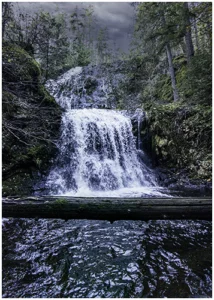
I still remember the first time I headed out to photograph waterfalls. The long hike