
ON1 Photo RAW Review – Smarter Edits for Stunning Photos
Do you remember that perfect shot you took? But then, post-processing was a struggle? You’re
Why do some sunrise or sunset photos blow you away, while others don’t? It’s not always as easy as it looks, capturing sunset and sunrises.
The golden hours of dawn and dusk can turn simple scenes into breathtaking views. The sky lights up with vibrant colours, offering a chance to create stunning images that move you.
In this guide, we’ll show you how to get ready for the light, pick the best spots, and master the technical side of photographing these moments.
Sunset photography needs the right camera settings to capture its true colours. There’s no single way to do it, but knowing how ISO, shutter speed, and aperture work together is essential.
Some sunset scenes have more light than your camera can handle. Hence, choosing the correct camera settings is crucial.
Exposure is crucial! Bright skies and dark foregrounds make it challenging for your camera to capture a correct exposure. It usually tries to average the light, which can overexpose the sky.
To fix this, try using spot metering on the sky’s brightest part. This keeps the sky’s colours rich while making the foreground dark.
Bracketing your exposures is also helpful. Take shots at different exposures, one under and one over. This gives you options for post-processing or creating HDR images.
Aperture controls light and depth of field. For sunset landscapes, use a small aperture, like f/8 to f/16. A smaller aperture can create a sunburst effect, adding interest to your photos.
For close foregrounds, try focus stacking. Take images focused at different distances and merge them later. Maintain a sharp focus on everything, starting with nearby objects and ending with a sunset.
Keep your ISO low, ideally 100 or 200; lower ISOs help you capture more dynamic range, As daylight fades, you’ll need to choose between raising your ISO or increasing the cameras shutter speeds.
Modern cameras handle higher ISOs better than the old ones. Don’t hesitate to kick it up to ISO 1600 or 3200. A bit of noise is better than a missed shot.
Understanding the exposure triangle is paramount. Changing one camera setting will affect the others. For example, a small aperture like f/16 needs a slower shutter speed or higher ISO. Finding the right balance is part of the creative process.
Looking to stretch your budget? Save 43% with Back to School. Plus 10% when you use code bwild10
Having the right gear will help you handle the changing light and opens up your creative options. The right tools can turn simple shots into stunning works of art.
Photography legend Ansel Adams once said, “The single most important component of a camera is the twelve inches behind it.” While this remains true, having the right tools makes capturing those magical moments easier and more successful.
When shooting a sunrise, your camera’s dynamic range is crucial. Modern DSLRs and mirrorless cameras can handle the bright sky and darker foregrounds well. It’s the contrast you’re really looking for.
Lens selection is important. Wide-angle lenses (16-35mm) are great for capturing expansive scenes. allowing you to capture more of the landscape, adding depth and scale.
Telephoto lenses (70-200mm or longer) offer a different look. Sometimes, making the sun appear larger against distant elements. Creating striking compositions.
For those early morning photo opportunities, don’t forget camera accessories. Extra batteries are crucial, as cold temperatures drain power fast. A remote shutter release helps avoid camera shake during longer exposures. A headlamp with a red light option preserves your night vision while setting up in the pre-dawn darkness.
I can’t state this enough: I’ve had many students show up to a photo shoot without one. Using a tripod ensures your images stay sharp, no matter the shutter speed. This stability lets you shoot at lower shutter speeds and ISO settings. This results in images that are cleaner, with less noise and better detail in the shadows.
A tripod also changes how you approach composition. When your camera is secure, you can frame your shot carefully. This allows for more thoughtful, compelling images.
If you’re worried about portability, consider a lightweight travel tripod made of carbon fibre. They cost more but are lighter, making them easier to carry to remote locations. Ensure your tripod can handle your camera and heaviest lens.
Filters are powerful tools for sunrise and sunset photography. Graduated neutral density (GND) filters help balance the exposure between the bright sky and darker foreground.
By placing the dark part over the sky, you can reduce its brightness. This maintains proper exposure in the foreground. It preserves detail that would be lost in a single exposure.
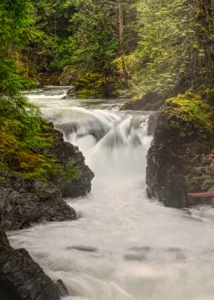
Standard neutral density filters reduce light evenly across the frame. They allow for longer exposures in brighter conditions. This creates effects like silky-smooth water or streaking clouds.
Circular polarizing filters offer another creative option. They reduce glare and reflection while enhancing colour saturation. This makes skies appear deeper blue and foliage more vibrant. When photographing sunsets near water, a polarizer can either enhance or reduce reflections depending on how you rotate it.
While physical filters show results in real-time, many effects can be enhanced in post-processing. But capturing the best image in-camera gives more flexibility when editing. This is crucial for the extreme dynamic range of sunrise and sunset scenes.
Photographing sunrises and sunsets is all about timing. The golden hour, just after sunrise or before sunset, provides you the best light. This light is warm and creates long shadows that add depth to your photos.
Your location and the season affect the best times. In summer, you might need to wake up early, whereas in winter, you can sleep in. As photographers to we really need sleep? Just remember that you need to be in position about an hour before the best times.
The best light is often just before or after sunrise and sunset. In about 20-30 minutes, the sky turns a soft pink, purple, and blue.
Don’t pack up yet; the “blue hour” just after sunset creates a magical twilight. The sky turns deep blue, making moody images. This light is different from the golden hour.
To catch these moments, arrive 30 minutes before this magic hour. This lets you set up and become ready for the best light. The most vibrant colours happen about 10 minutes before or after a sunrise or sunset.
Clear skies aren’t always optimal for photography. The most stunning shots often have partial cloud cover. Clouds reflect and capture light, making the scene more colourful.
High, thin clouds create vivid colours by scattering light. Mid-level clouds can make dramatic rays of light. Low, thick clouds can also create moody images.
I’ve found the best cloud cover is between 30% and 70%. This allows for coloured skies and a visible sun. Weather apps can help predict clouds, but learning to read the sky is also important.
For the best light, look for days with changing weather. Even bad weather can turn into great photo conditions. Patience and persistence are key in sunrise and sunset photography.
Great gear and timing are essential, but framing and composition are equally important. Let’s dive into some top techniques to take your sunset photos from good to great.
For amazing skies, put the horizon in the lower third to highlight clouds and colours. If your foreground is subject, place the horizon on the upper third to draw the focus on it.
Most cameras have a grid feature to help you place elements. Key elements of your picture can be positioned using these grid lines. The points where lines meet are great for focusing on the sun or silhouettes.
Don’t just focus on the sky in sunset photos. Adding interesting foregrounds adds depth and context. This turns a simple sky shot into a compelling landscape.
Look for elements that anchor your photo and add interest. Rocks, trees, water, people, or buildings can all be great subjects. They add scale and tell a story about the location.
Water is a great foreground because it reflects sunset colours, doubling the beauty. Get low to make your foreground stand out against the sunset.
Shooting in RAW allows you the flexibility to adjust white balance later without losing quality. This lets you experiment with different settings to find the perfect colour balance.
White balance settings can change the mood and colours of your sunset photos. Automatic white balance might not capture the warm tones of sunsets.
For warmer colours, use the “cloudy” or “shade” mode. These settings keep the sunset’s oranges and reds vibrant. For cooler tones, “tungsten” can give a blue atmosphere.
The sun’s brightness can confuse your camera’s metering. Manual white balance is often needed for sunset shots.
There's no one "right" white balance for sunset photos. The best choice depends on the mood you want. Feel free to try different settings to find what works best for your vision.
...Bob
Looking to stretch your budget? We’ve got good news! Use the SPECIAL code whosaid15 for an extra 15% off
Timing is everything in sunset photography. The best light doesn’t always happen right at sunset—it can be just before or shortly after.
Here’s what to know:
Planning ahead helps you avoid rushing and missing the best light.
Sunsets have a wide range of light—bright skies and dark foregrounds. If your camera’s set to auto, it can easily mess up the exposure.
Avoid these common issues:
Taking control of your settings helps capture the colours and details of the scene.
Even with great light and settings, your photo can still look dull if it’s not well composed. Strong composition makes your image stand out.
Tips to improve your shots:
Thinking carefully before taking a sunset photo can greatly enhance its quality.
Sunset and sunrise photos can be powerful, but only if you’re ready. With the right timing, camera settings, and a good eye for composition, you can turn simple scenes into stunning shots. Practice, be patient, and don’t be afraid to try new things. The sky’s never the same twice. So good luck and have fun.

Do you remember that perfect shot you took? But then, post-processing was a struggle? You’re

For me, photography is truly magical. It simply transcends from looking at the world to

Have you ever stood before a majestic waterfall? Its waters cascade over jagged rocks, showing