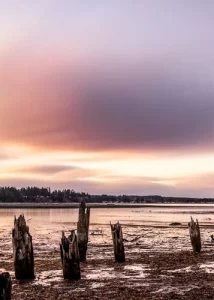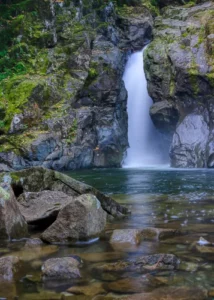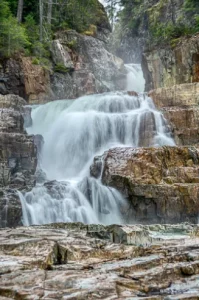
Long Exposure Photography: Control Motion in Your Photos
Long exposure photography is a technique that uses slow shutter speeds to capture silky smooth
Share the Love This Valentine’s Day – 25% Off


Imagine walking through a dense forest, smelling pine and seeing green everywhere. You grab your camera, eager to take the perfect photo. But shadows and a busy background make it tough to focus. You might wonder, “How do I make my photos stand out in this mess?” Forest photography is all about exploring nature’s beauty and mastering depth and layers.
Creating layers in your photos can pull viewers in. The right mix of foreground, mid-ground, and background can make a simple photo amazing. But capturing depth in forest images isn’t easy. Photographers face challenges like low light, busy scenes, and nature’s surprises. With some new skills and the right gear, you’ll be able to see the forest for the trees and show off nature’s beauty.
Forest photography mixes art with nature’s beauty. Forests are full of colours, textures, and, if you’re lucky, sometimes wildlife. However, there is a challenge to capture the complexity of the woodland wonders.
This type of photography is special because of its challenges. Wild nature can be scary for photographers. But, with the right preparation and techniques for forest photography, you can conquer it.
Capturing sunlight through leaves or finding hidden shadows is part of the fun. It lets you tell a story with your photos. Learning more about this art makes you appreciate nature even more.
In forest photography, understanding depth and layers is essential. They invite your viewers to step into the scene. Learning to incorporate layers enables you to create images that captivate the viewer’s attention and evoke emotional responses.
By using depth and layers in photography, you can make your photos feel more three-dimensional, drawing viewers into the scene.
Depth perception is created by using foreground, middle ground, and background elements to add dimension. Leading lines, framing, and perspective also help create a sense of space.
Layers add visual interest by stacking different elements, like mountains behind trees or a subject in front of a blurred background.
Using depth and layers in your woodland photography makes your photos more engaging. Photos with depth keep viewers interested for longer. They can make your forest scenes look more dynamic.
Layering also makes your images seem more real. Capturing mist or haze can add depth, enriching your photography. A strong foreground can make your photo pop. It guides the viewer’s eye.
Adding figures or small objects can make your photo more interesting. Simple compositional changes can turn a good photo into a great one. Try different techniques to add depth to your forest photos.
Understanding depth of field is key for better forest photos. It’s about how far in a photo things stay sharp. This helps you choose what’s clear and what’s not.
Changing your aperture can change your photos, especially in terms of blur. It lets you pick what’s in focus and what’s not.
Depth of field (DOF) has two main types: shallow and wide. A shallow DOF, like f/2.8, makes the background blurry. This is excellent for making your subject stand out.
A wide DOF, like f/22, keeps more of the photo sharp. This is ideal for wide-angle shots where you want everything in focus.
Changing depth of field is not just about aperture. Your lens’s focal length matters too.
Being close to your subject also affects DOF. The closer you are, the blurrier the background gets. For wide shots, use a smaller aperture (F/16 – F/22) to keep everything sharp.
Here’s a handy table summarizing different aperture settings and their effects on depth of field.
| Aperture | Depth of Field Type | Best Use Case |
|---|---|---|
| F/2.8 | Shallow depth of field | Isolating subject (wildlife) |
| F/5.6 | Shallow to medium | General portrait and nature photos |
| F/11 | Medium Depth of Field | Landscapes with Foreground and Background |
| F/22 | Wide | Maximal clarity in landscapes |

Exploring advanced techniques can make your forest photos better. Playing with light and shadow adds depth. Soft light shows textures, and backlighting makes subjects stand out.
Light and shadow are crucial in forest scenes. Dodging and burning in editing brings out each layer. A shallow depth of field focuses on the front, making the back less clear.
Paths or streams add depth and interest, enhancing the sense of depth in your composition. Using the rule of odds, you can enhance your photos by including three or five subjects.
Choosing the right lens is important. Wide-angle lenses capture big views, and macro lenses show tiny details.
| Lens Type | Recommended Focal Length | Ideal Use |
|---|---|---|
| Wide angle lens | 10-36mm | Expansive landscapes |
| Macro Lens | 90-105mm | Close-up details |
| Telephoto Lens | 70-200mm | Distance subjects |
Getting your composition right is key in forest photography. A few basic techniques can make your photos stunning. They draw viewers into the forest’s magic. Let’s explore some top tips, like the Rule of Thirds and leading lines.
Now, let’s look at framing your forest photos. Use natural elements like branches or foliage to frame your subject. This makes your photo more immersive, as if the viewer is part of the forest, enhancing the sense of depth.
Negative space is also important. It’s the empty area around your subject. It isolates your subject and highlights its importance in a busy scene, creating a sense of depth. Negative space brings calm and focus to your photos.
| Technique | Description | Impact on Composition |
|---|---|---|
| Leading lines | Natural lines that guide viewers into the image | Enhances depth and encourages exploration |
| Framing | Using elements to surround and focus on the subject | Increases immersion in the scene and creates a sense of depth. |
| Negative Space | Empty areas around the subject | Highlights the subject, offering simplicity |
Using these composition tips will help you take photos that grab viewers' attention. By applying the Rule of Thirds, using leading lines, mastering framing, and embracing negative space, you'll create stunning forest photos that convey a sense of depth. These photos will tell a story that viewers will love.
...Bob
Forest photography is a mix of creativity and the right tools. Whether you’re new or experienced, the right gear makes a big difference. Let’s look at essential equipment and common mistakes to avoid.
Choosing the right gear is imperative; here’s a list of must-haves:
| Gear | Purpose |
|---|---|
| DSLR or mirrorless cameras | Captures high-quality images with manual control |
| Wide angle lens | Captures expansive landscapes |
| Tripod | Minimizes camera shake during slower shutter speeds |
| Filters | Enhances colour and control exposure |
| Shutter Release Tool | Prevents camera shake for sharper images |
Every photographer makes mistakes. Here are some tips to avoid common errors and improve your forest photography:
With the right gear and these tips you can avoid the most common mistakes.
As we finish our journey in forest photography, it’s clear that mastering depth and layers is crucial. Using low-angle shots, aerial views, and moonlit nights can greatly improve your photos. Each time you go into the woods, you can create something truly special.
With the right tools and an eye for composition, you can improve your photography.
Try black-and-white photography to show contrasts or use overcast skies to soften the light. Remember, timing is key, so look for the best light during Golden Hour or Blue Hour.
Use what we’ve talked about to show the beauty of light and shadow. You’ll not only show the woods’ beauty but also let viewers see the world through your lens in a new way.

Long exposure photography is a technique that uses slow shutter speeds to capture silky smooth

The first time I went to the Medicine Bowls in Courtenay, it felt like a

Lower Myra Falls is one of those places in Strathcona Park that feels far more