Golden Hour Photography: Essential Tips for Beginners
Have you ever seen a photo that just glows with warmth and beauty? This is what we call ‘golden hour photography’ Most likely, the photographer captured it during the magical time we call the golden hour.
Why do we love the magical time, right after sunrise and right before dusk? During the golden hour, everyday photos captured at this time of day look like they belong hanging in a gallery. Love me that golden hour!
Key takeaways
Golden hour happens twice daily—an hour after sunrise and before sunset—providing soft, warm light that’s ideal for photography, particularly during the last hour.
Arrive at your location early and use planning apps to make the most of this brief window of optimal lighting during sunset time.
Shoot in raw format and bring a tripod for the best image quality, as light levels change during the day.
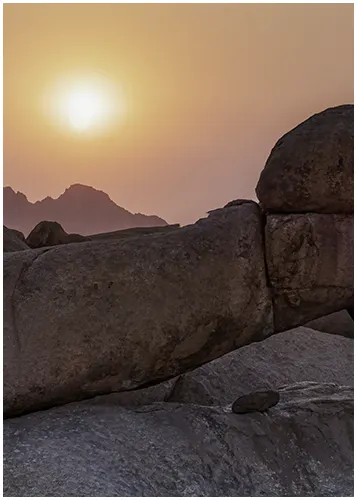
Position subjects with the sun behind them (back lighting) to create beautiful glowing effects and dramatic silhouettes.
Prefer Listening? Click To Tune Into the Audio Version Here!
Table of Contents
Introduction: The magic of golden hour
What is the golden hour?
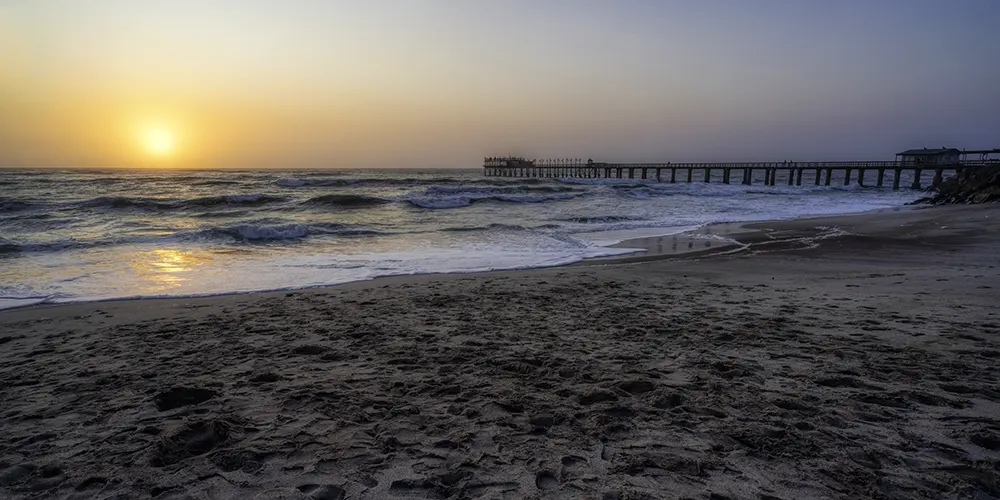
The golden hour is that captivating time, about an hour after sunrise and an hour before sunset, when the world seems bathed in a soft, warm glow. This phenomenon occurs twice daily, creating the ideal light for photographers, especially in the last hour before sunset. The soft, golden light during this time is perfect for capturing outdoor portraits and landscapes.
Why is the golden hour so special?
Photographers treasure golden hour lighting for a few key reasons:
Soft, diffused light: The gentle light flatters everything it touches.
Rich, golden tones: These hues create a warm and inviting atmosphere.
Dramatic shadows: Long shadows add depth and visual intrigue to photos.
The golden hour is a truly magical time, transforming everyday scenes into something extraordinary.
Looking to stretch your budget? We’ve got good news! Save an additional 10% use code bwild10
Golden hour techniques and creative applications
Backlighting: Create a radiant halo
Position the sun behind your subject to create a soft, glowing halo that separates them from the background. A reflector can be useful here to gently brighten your subject’s face.
Silhouettes: Capture striking shapes
Place your subject in front of a bright sky to create a silhouette, highlighting their shape. Opt for subjects with interesting outlines to maximize the impact.
Starbursts: Add sparkle and drama
To capture a starburst effect, shoot directly into the sun using a small aperture (like f/16 or higher). Be mindful not to overexpose the sun to maintain balance in your shot.
Lens Flare: Embrace a dreamy effect
Lens flare happens when light scatters within your lens, creating artistic streaks or circles. Adjust your camera’s position or aperture to control the flare and add a soft, dreamy touch.
Shadows: Enhance depth and interest
Golden hour’s long shadows add texture and depth. Use them to draw the viewer’s eye, frame your subject, or showcase details in your scene.
Understanding the science behind the golden light
Why the sun’s position matters
The quality of sunlight changes based on the sun’s position in the sky:
Midday Sun: When the sun is directly overhead, light has a shorter path through the atmosphere, making it harsh and causing strong shadows. Golden Hour Sun: As the sun sits lower on the horizon, light travels through a thicker layer of the atmosphere, scattering blue tones and leaving a warm, golden glow.
The importance of colour temperature
Colour temperature, measured in Kelvin, tells us how warm or cool light appears. Lower Kelvin values indicate warmer light—perfect for the golden hour’s soft, inviting tones.
Making the most of golden hour:
Don’t miss this brief window!
Golden hour doesn’t last long, so plan ahead. Use apps or websites to pinpoint your local golden hour times, and arrive early to set up.
Scout the perfect spot
Look for locations where the light interacts with features like trees or buildings, and consider the angle of the light relative to the horizon.
Pack essential gear
Camera: Shoot in RAW format for better editing flexibility.
Lenses: Bring a selection, such as a wide-angle for landscapes or a telephoto for portraits, to fully capture the golden light.
Tripod: A tripod ensures stability, especially as light fades into the blue hour.
Reflectors or Flashes: These tools help brighten shadows, adding dimension to your subject.
With the right preparation, you can capture the golden hour in all its brilliance!
Beyond portraits and landscapes: Exploring diverse genres
Wildlife: Capture animals in golden light
Golden Hour is excellent for wildlife photography. The warm light brings out the colour and texture of animals.
Architecture: Show off buildings in a new way
The long shadows can emphasize details in buildings and make them look grand.
Street photography: Capture mood and mystery
The contrast of light and shadow on the street can create cool effects. Look for intriguing moments and stories.
If you shoot in RAW, you have much more control over the final look of your photos.
Adjust the white balance
You can make your photo warmer or cooler by adjusting the white balance.
Fine-Tune exposure and contrast
Adjusting exposure and contrast helps bring out details in all parts of your image.
Make details pop up with clarity and sharpness.
These tools can make your photo crisper and more refined. [Note: The blog post outline recommends using clarity and sharpness tools, but the sources do not mention this.]
Colour grading for mood and atmosphere
You can use colour grading to make your photo feel a certain way, such as happy or mysterious.
HDR blending for difficult scene
Sometimes a scene has glowing and very dark areas. HDR blending combines multiple photos taken at different exposures to make sure everything looks great, especially during the last hour before sunset.
Adapting to challenging conditions: Midday suns and cloudy days
Midday Sun: Find creative solutions
Even when the sun is high, you can still take excellent photos. Look for shady spots or use a reflector to enhance the beautiful light.
Cloudy Days: Embrace the soft light
Overcast days have soft light that’s ideal for portraits, especially during the golden hour in photography. It minimizes harsh shadows and makes the light even.
All the weather is good!
Every type of weather can produce unique photos, especially during the golden hour light. It’s important to note that this blog post’s outline recommends viewing all weather conditions as opportunities, particularly during the best time of day, a point that the sources fail to mention. Rain, clouds, or even fog can add drama and interest to your sunset time photos.
Advanced golden hour techniques
Master the golden hour with these advanced techniques to elevate your photos from excellent to exceptional.
Multiple exposure magic
Combine two to three shots of the same scene at different exposures to capture both the deep golden hues and shadow details. Use your camera’s HDR mode or manually bracket exposures for dynamic results.
Graduated ND Filter: Balances bright skies with darker foregrounds for even exposure.
Prism Filter: Adds a dreamy, ethereal effect to your images.
Advanced composition tricks
Position your subject where golden light creates natural leading lines. For a dramatic rim light effect, place the sun just outside your frame’s edge to outline your subject with a subtle glow.
Light painting
Enhance the golden hour glow with light painting techniques. Use a small LED light to illuminate foreground elements while preserving the warm background tones.
Pro timing tip
Shoot at 15-minute intervals throughout the golden hour to capture subtle shifts in light. Each phase offers unique creative opportunities, adding variety to your portfolio.
Conclusion: Cultivating a creative vision in golden light
Golden hour photography goes beyond camera settings; it’s about capturing emotion and beauty in soft, golden tones. Experiment, find what works best in that first hour after sunrise or last hour before sunset, and let the light inspire your storytelling. Most importantly, have fun as you develop your unique style
For golden hour photography, use ISO 100-400 to minimize noise while capturing warm, natural light. These lower ISO settings work well since golden hour provides adequate lighting and helps maintain image quality while photographing during sunrise or sunset.
The golden hour effect in photography refers to the soft, warm lighting that occurs during the first hour after sunrise or last hour before sunset. This natural phenomenon creates long shadows, golden hues, and diffused light ideal for capturing stunning outdoor photos.
When shooting during golden hour, spot metering mode is typically the best choice. It measures light from a small area, helping you properly expose subjects against dramatic sunset lighting while preventing overexposed skies or underexposed foregrounds.
Photographers use golden hours (the first and last hours of sunlight) because they provide soft, warm light that creates long shadows, reduces harsh contrast, and adds a magical golden glow to photos. This lighting flatters subjects and produces stunning landscapes.