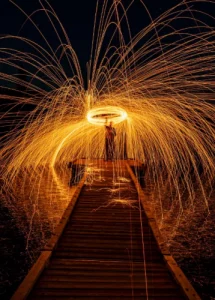
Spinning Fire: A Guide to Steel Wool Photography
I think steel wool photography creates some of the most amazing images you can capture
Share the Love This Valentine’s Day – 25% Off

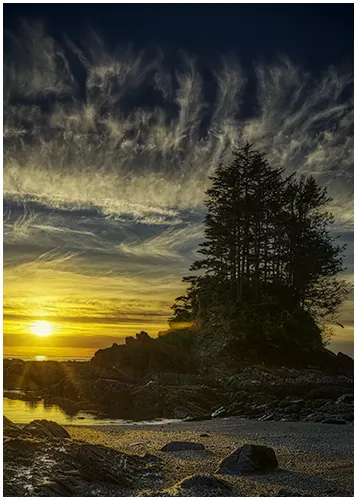
Wonder why some outdoor photos glow like magic? It’s not about the gear. The real secret is timing! It’s crucial to position yourself and the camera at the ideal time of day.
You’ll want to be out when the sun’s low position creates a warm glow. The sun’s low angle softens shadows and adds warmth. Hence we call it the ‘golden hour in photography’. It makes every scene look extraordinary, whether it’s a portrait or a landscape.
This light makes every photo beautiful and full of life. Our guide will teach you how to use this special light to make your images unforgettable.
The quality of natural light changes during golden hour. It creates a breathtaking atmosphere. This special light gives your subjects a warm, flattering glow, making even ordinary scenes look extraordinary.
As the sun sits low, its rays travel lower through the Earth’s atmosphere. As the atmosphere filters out the blue light, warm colours pass through.
The sun’s position creates ideal lighting. light becomes soft and directional, adding depth and texture.
| Time of Day | Light Quality | Shadows | Colour Temp | Advantages |
|---|---|---|---|---|
| Golden Hour | Soft, diffused, directional | Long, gentle, defined | Warm | Flattering skin tones, dimensional lighting, natural warmth |
| Midday | Harsh, direct, overhead | Short, dark, unflattering | Cool to neutral | High contrast, good for black and white, vibrant colours |
| Blue Hour | Soft, diffused, even | Minimal, subtle | Cool | Dramatic skies, city lights, moody atmosphere |
| Over Cast | Very diffused, directionless | Minimal to none | Neutral to cool | Even lighting, good for portraits, reduced contrast |

Looking to stretch your budget? We’ve got good news! Save an additional 10% use code bwild10
The soft light during golden hour wraps around subjects like a gentle embrace. This creates a flattering effect, smoothing skin tones and reducing harsh shadows.
Colours during this time are magical. Warm hues enhance landscapes, architecture, and portraits. Greens appear vibrant, skin tones look healthier, and the overall palette shifts to a pleasing warmth.
Shadow characteristics change dramatically during golden hour. Shadows are longer and softer, adding depth and dimension. These shadows create natural leading lines and patterns, strengthening your visual storytelling.
The directional quality of golden hour light reveals texture and form. It brings out details in subjects, whether it’s tree bark, weathered faces, or architectural details.
Golden hour photography casts warm light, bringing comfort, nostalgia, and peace. Your photos become impactful and memorable.
While the golden hour offers creative freedom, it also requires patience and mindfulness. Photographers learn to slow down and connect deeply with their surroundings. This leads to thoughtful, intentional photos that stand out.
There is a brief moment when all there is in a man's mind and soul and spirit is reflected through his eyes, his hands, his attitude. This is the moment to record.
Yousuf Karsh
Depending on where you are and the season, the golden hour will be different. Luckily, there are tools to help find these moments.
Apps like PhotoPillsand The Photographer’s Photo Ephemeris can calculate golden hour. You can predict the ideal timing by inputting your location and date.
Seasons change; therefore, the golden hour changes. In northern areas, it might start as late as 9 p.m. in the summer. Winter might see it start as early as 4 PM.
| Spring | Typical Start Time | Duration | Light Quality | Best For |
|---|---|---|---|---|
| Spring | 6:00-7:30 PM | 45-60 minutes | Balanced warmth, fresh greens | Nature, flowers, landscapes |
| Summer | 7:30-9:00 PM | 60-75 minutes | Warm, long shadows | Beach scenes, architecture |
| Fall | 5:30-6:30 PM | 45-60 minutes | Rich amber tones | Foliage, rural landscapes |
| Winter | 4:00-5:00 PM | 30-45 minutes | Soft, diffused light | Snow scenes, portraits |
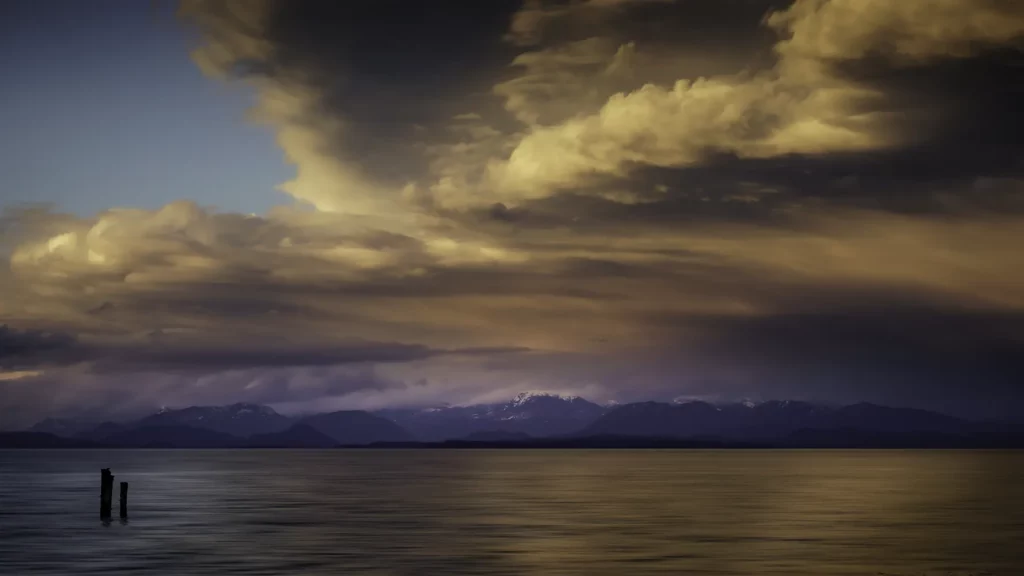
Light and weather can affects golden hour; clear skies give sharp, directional light. Partly cloudy skies create dramatic scenes. Overcast days soften the light but still offer beauty.
Local terrain also changes golden hour timing. If you’re in a valley or near mountains, the sun might hide before sunset. It may be beneficial to plan your shoots by scouting locations in advance.
Outstanding golden hour photos depend on your camera settings. The warm light does a lot, but knowing how to set your camera makes a big difference. Let’s look at the technical side of golden hour photography to help you capture those magical moments.
I’m not one to give out camera settings, as each lighting situation will be different. However, I don’t have an issue stating my starting point. Also I normally shoot in an aperture priority.
Normally the early golden hour has plenty of light, so keep your ISO low (100 to 400) to avoid noise.
As the sun sets, you might need to raise your ISO. Mid-golden hour is usually 400-800.
In the final minutes, you have to adjust your ISO to 1600 or more. It’s better to have a slightly noisy photo than to miss the shot.
| Phase | ISO | Light Conditions | Considerations |
|---|---|---|---|
| Early golden hour | 100-400 | Bright, warm directional light | Maintain low ISO for maximum quality |
| Mid golden hour | 400-800 | Softer light, increasing warmth | Balance ISO with aperture needs |
| Late golden hour | 800-1600+ | Rapidly diminishing, very warm light | Prioritize capturing the moment over noise |
| Blue hour transition | 1600-3200 | Low light, blue tones emerging | Consider tripod use instead of extreme ISO |
Just be aware that you going to have to change your ISO as the sun sets over the horizon.
...Bob
Choosing the right aperture changes your photo’s mood and focus. Aperture controls how much light gets in and the depth of field.
For portraits, use a wide aperture like f/1.4 to f/4.6. This makes the background blur and makes your subject stand out. Golden light will add a flattering glow to skin tones.
For landscapes, a closed aperture of f/10 to f/16 is best. It keeps your scene sharp and lets in enough light.Don’t forget the golden hour enhances textures and adds depth.
To capture that sunstar effects, use a narrower aperture of f/16 to f/22. This turns the sun into a starburst pattern. With a higher aperture you'll need slower shutter speeds or higher ISO for proper exposure.
Pro-Tip
Your shutter speed will vary based on your subject and what you aim to capture. I can’t say this enough know and study the reciprocal rule. Use 1/focal length. For example, with a 200mm lens, aim for 1/200 second. Adding a buffer (1/100 or faster) helps avoid blur.
As golden hour turns to blue hour, longer exposures are required. This is where our buddy the tripod is essential. Shutter speeds of several seconds can capture stunning light trails and cloud movement.
Check your histogram often during shoots. The contrast between bright skies and dark foregrounds can fool your camera. The histogram helps ensure you capture all the detail in both highlights and shadows.
for additional visit our interactive camera, aperture, shutter speed and ISO tools here on the website.
The exposure triangle is key during golden hour. Adjusting one setting affects the others. Aperture priority mode (A or Av) is useful, as it lets you set your aperture while the camera adjusts shutter speed.
Pro-Tip
Golden hour provides beautiful light, which is wonderful, but light changes fast during golden hour, so you must adapt quickly.
Silhouettes create dramatic, emotional images. To capture compelling silhouettes, position your subject between your camera and the sun. Meter for the bright background, or try using exposure compensation of -1 to -2 stops.
The key to striking silhouettes is finding subjects with distinctive shapes. People, trees, and architectural elements work well. Ensure your subject has clear separation from other elements in the frame.
Lens flare can enhance or ruin your golden hour photos. To use flare creatively, partially block the sun with your subject, creating a dreamy, ethereal effect.
For controlling flare, try these techniques:
Remember, not all lenses handle flare the same way. Prime lenses often produce more pleasing flare effects than zoom lenses.
Shooting directly into the sun creates dramatic backlit images. But it presents significant technical challenges. Avoid looking directly at the sun through your viewfinder; use Live View instead to compose your shot safely.
Managing contrast is crucial when shooting into the sun. Your camera’s dynamic range will be pushed to its limits. Consider using graduated neutral density filters to balance exposure between sky and foreground.
Fill light is your best friend when shooting back-lit subjects. You have several options:
When composing backlit shots, pay attention to where the sun falls in your frame. Placing it behind your subject creates a beautiful rim light. This technique is a go-to for professional portrait photographers.
To avoid unwanted lens flare when shooting toward the sun, use your hand or a lens hood to shade the front element of your lens. This simple technique improves contrast and prevents distracting colourful artifacts.
Another trick is to bracket your exposures when shooting challenging back-lit scenes. Taking multiple shots at different exposure values gives you options later in post.
Finding the proper place can convert regular scenes into beautiful pictures. Before your shoot, take the time to locate the best places to in your area.
When scouting, look interesting subjects and think about where the sun will set or rise. The best spots combine these elements perfectly.
Great golden hour photos need intriguing elements and light. Look for objects you can incorporate into the foreground like trees, rocks, and buildings. The sun’s light makes almost anything stand out.
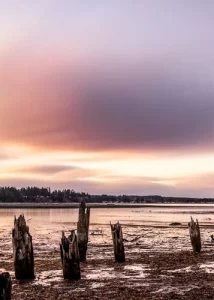
Different places offer unique golden hour opportunities. Urban areas have dramatic shadows, while natural landscapes glow warmly. Coastal areas offer reflective water and open horizons.
For portraits, find spots with both shade and direct light. This lets you capture soft portraits and dramatic rim lighting. Open fields, beaches, and urban areas with varied architecture are ideal for portraits.
The horizon line plays a critical role. An open horizon lets you capture more of that beautiful light.
Higher spots can extend your shooting time. Standing on top of a hill or building gives you extra few minutes of golden light. Every moment counts.
The horizon’s position in your frame changes your image’s mood. A low horizon emphasizes the sky, while a high one focuses on the foreground.
| Horizon | Effects | Best Use | Examples |
|---|---|---|---|
| Low in Frame | Emphasize sky | Dramatic clouds present | Sunset beach scenes, mountain vistas |
| High in frame | Emphasizes foreground | Interesting ground elements | Flower fields, urban streets |
| Centred | Creates balance | Equal interest above/below | Reflections, symmetrical scenes |
| Tilted | Creates dynamic tension | Action or movement present | Sports, wildlife in motion |
Capturing stunning images during golden hour is just the first step. The magic truly happens in post-processing. Here, you can enhance the natural beauty of that warm, directional light.
Start by boosting the warmth in your golden hour photography. But don’t overdo it. Slightly increase vibrance rather than saturation to keep skin tones natural. Use graduated filters to balance bright skies with darker foregrounds.
The rim light created during golden hour can be enhanced. Carefully adjust highlights and clarity to bring out the best.
White balance is your secret weapon for golden hour edits. Try setting your temperature between 5500-6500K to preserve the natural golden glow. For a warmer look, push it toward 7000K. IE try the shade setting in lightroom.
When editing sunset portraits, a slightly warmer white balance helps. It emphasizes the magical quality of fill light on your subject’s face.
On1 offers excellent tools for enhancing golden hour photos. It has targeted adjustment brushes and colour grading panels. Luminar Neo excels at precise colour editing, perfect for fine-tuning the orange and yellow tones.
For mobile editing, apps like Snapseed and Lightroom feature filters. They’re designed to complement golden hour photography. Many photographers create custom presets to quickly apply their favourite golden hour enhancements.
Remember, subtle adjustments often yield the most natural results. The goal isn’t to create golden hour where it didn’t exist. It’s to enhance the beautiful light you’ve already captured.
Golden hour is more than just pretty light, it’s a powerful tool for shaping your photos. By knowing the best time of day and paying attention to the light you’ll capture richer tones, deeper shadows, and stronger moods.
With these practical tips, you’ll start seeing the world differently. Colours will pop, shadows stretch, and even simple scenes turn into something cinematic. It’s all about timing, awareness, and letting the light do the heavy lifting.

Two hours before sunset can be good for photos, but it’s just outside golden hour. For the warmest, softest light, shoot within the last hour before sunset.
Golden hour usually occurs one hour after sunrise and one hour before sunset, depending on season and location. Apps like PhotoPills can help you find exact times.
I think steel wool photography creates some of the most amazing images you can capture
Long exposure photography is a technique that uses slow shutter speeds to capture silky smooth
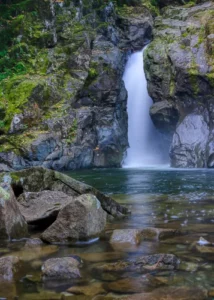
The first time I went to the Medicine Bowls in Courtenay, it felt like a