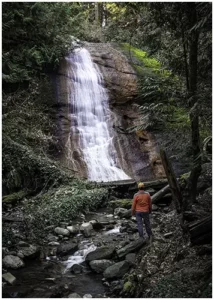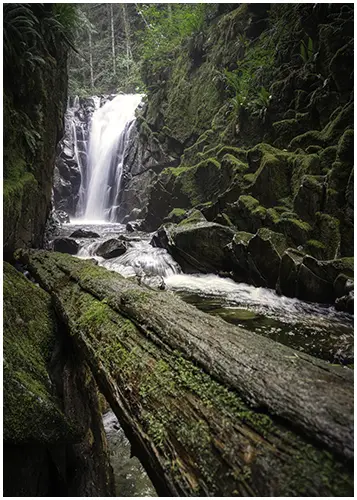
The Charming Northfield Falls in the Heart of Beach Estate Park
Looking to kill off an hour while in Nanaimo, BC? Just a short hop-skip and


Did you know that using a graduated neutral density filter can make a dramatic difference in your landscape photography? These ingenious filters allow you to balance the exposure between the sky and the foreground. They truly the have the power to enhance your photography skills.
When it comes to photography, achieving the perfect shot often means having precise control over exposure. This is where graduated neutral density ( Gnd ND) filters come into play.
A Gnd ND filter is a specialized photo filter that helps balance exposure in high-contrast scenes. A gradient filter is a rectangular or square piece of glass or resin that is darker at one end, usually the top, and gets lighter towards the other end. This gradient helps control the amount of light entering the lens, so that both the sky and the foreground are properly exposed in the image.
The use of these filters offers several benefits for photographers looking to elevate their images:
ND filters are essential for balancing exposure and controlling dynamic range in photography, especially in difficult lighting conditions.
This section is dedicated to mastering the use of graduated ND filters. If you’re a landscape photographer, using filters can enhance your photos by increasing contrast and darkening the skies for a dramatic effect. We will give you a step-by-step guide on using a 3-stop hard-edge graduated ND filter for capturing amazing images. Additionally, we will highlight common pitfalls to avoid, ensuring that you make the most of your graduated ND filter.
Using a graduated filter requires careful positioning and technique to achieve optimal results. Follow this step-by-step guide to skillfully use of a graduated ND filter:
While graduated ND filters are incredibly useful for many situations, there are times when it’s best to avoid using them.
Soft-edge, hard-edge, or reverse graduated neutral density filters provide different ways to control exposure and create stunning photos.
| Graduated ND Filter Type | Transition Type | Suitable Scenes |
|---|---|---|
| Soft-edge | Smooth and gentle | Landscapes with a diffused horizon and city-scapes with gradual changes in brightness |
| Hard-edge | Sharp and defined | Seascapes and mountains with distinct horizon lines |
| Reverse | Centre-to-top fade demonstrates how a soft edge filter would transition smoothly from one part of the image to another. | Use a graduated ND filter for balanced sunrises and sunsets. |
This section is dedicated to mastering the use of graduated ND filters. If you’re a landscape photographer, using filters can enhance your photos by increasing contrast and darkening the skies for a dramatic effect. We will give you a step-by-step guide on using a 3-stop hard-edge graduated ND filter for capturing amazing images. Additionally, we will highlight common pitfalls to avoid, ensuring that you make the most of your graduated ND filter.
Using a graduated filter requires careful positioning and technique to achieve optimal results. Follow this step-by-step guide to skillfully use of a graduated ND filter:
While graduated ND filters are incredibly useful for many situations, there are times when it’s best to avoid using them.
Before using the filter, consider your scene and subject to make the right decision.
| Common Pitfalls | When to Avoid Graduated ND Filters |
|---|---|
| High-contrast scenes with well-defined horizons | Clear sky and foreground separation. |
| Subjects with uneven horizons | Uneven horizons like mountains or trees. |
| Low-contrast scenes | In low-contrast scenes, a filter may not improve image quality. |
In this section, we will discuss the various ways in which graduated ND filters can be used creatively. We will also explore the different inspirations that can be drawn from using these filters.
Landscape photography is all about capturing the beauty of nature and creating stunning compositions. Graduated ND filters are indispensable for achieving balance in your landscape photography. These filters help you take stunning photos by controlling exposure and managing the difference between light and dark areas. You can capture both the bright sky and the darker foreground, resulting in balanced and captivating photographs.
Graduated filters enable you to bring out the details in both the sky and the landscape, showcasing the full range of colours and tones. Graduated ND filters help control exposure for beautiful landscape photos, allowing you to adjust light and darken skies for better contrast.
When shooting landscapes, graduated ND filters are my go-to tool for achieving a balanced exposure. They allow me to capture the stunning colours of the sky and maintain the detail in the foreground, creating a harmonious and captivating image.
Pro-Tip
Graduated filters offer a multitude of applications beyond overexpose of your photo. They can be combined with other filters to create special effects and add creativity to your photos. By carefully selecting and stacking filters, you can push the boundaries of what can be achieved with graduated filters.
Combining a graduated ND filter with a polarizing filter intensifies colours and reduces reflections. This creates vibrant landscape photographs that showcase how filters can work well with digital technology. You can use a graduated ND filter with a neutral density filter of any stop and take longer exposure photos and create dreamy effects like blurred water or streaking clouds.
When it comes to combining filters, the possibilities are endless. Experiment with different combinations to unleash your creativity and add a unique flair to your photography.
Combining filters has opened up a whole new world of creative possibilities for my landscape photography. By stacking a graduated ND filter with a polarizer, I can enhance the colours of the sky and eliminate unwanted reflections, resulting in truly mesmerizing images
Pro Tip
Proper maintenance is key to preserving the quality and longevity of your graduated ND filters. Dust, smudges, and scratches can significantly impact the quality of your photos. Follow these care tips to ensure your filters stay in optimal condition:
To ensure that your graduated ND filters continue to provide excellent performance for your digital cameras over the long term, it is imperative that you adhere to these cleaning and protection guidelines.
Storing your graduated ND filters properly helps protect them and ensures easy access while out shooting.
Consider the following storage solutions:
By using these storage solutions, you can keep your graduated ND filters organized, protected, and easily accessible when needed.
Are you ready to unlock the full potential of your landscape photography using graduated neutral density filters? Grd ND filters help you achieve that balanced exposure where you can capture stunning sky-to-land photos like a pro. From soft and gentle edges to dramatic and defined transitions, explore the different filter types to find the perfect match for your style
Begin with a soft-edge graduated ND filter for versatile landscape shots. Its gradual transition suits scenes with complex horizons. Experiment to find the ideal density and size for your lens. Graduated ND filters enhance dynamic range, balancing exposure for stunning images.
Yes, you can achieve similar effects in post-processing as using Grad ND filters. Techniques like exposure blending and selective adjustments replicate Grad ND filter effects, offering flexibility and control in editing landscapes.
Investing in a good graduated ND filters is important for photographers who want high-quality images. Good materials and coatings make these filters a valuable long-term investment.

Looking to kill off an hour while in Nanaimo, BC? Just a short hop-skip and

Photography can be a fulfilling and enjoyable hobby that brings a creative outlet to your

Welcome to our guide to Photoshop tutorials for beginners: A Complete Beginner’s Tutorial for Learning