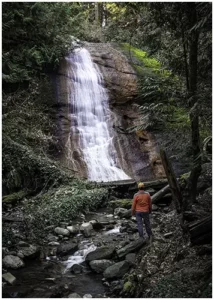
The Charming Northfield Falls in the Heart of Beach Estate Park
Looking to kill off an hour while in Nanaimo, BC? Just a short hop-skip and


Have you ever snapped a photo only to find it too dark or washed out? Don’t worry; we’ve all been there! Understanding what is exposure in terms of photography is one of the many keys to capturing stunning images. In this article, we’ll unravel the mysteries of a proper exposure, demystifying aperture and shutter speed, and ISO settings. By the end, you’ll be a master at controlling the amount of light in your camera. Let’s dive in!
Immerse yourself in the art of capturing moments through photography, and the term ‘exposure’ will soon become your companion. Exposure underscores the crux of photography. It’s the camera’s selection of how much light will make it to the sensor to create an image. A perfectly exposed image is a result of a balancing act between brightness and darkness.
Crucial to capturing great photos, exposure is the amount of light and key to revealing intricate details, imparting specific atmospheres, and stirring emotions. Let’s dive deeper and unlock the essentials of exposure in the world of digital photography.
Exposure: the universe within each of your photos. The impact of it is profound. It determines the brightness, contrast, detail, and overall aesthetic appeal of your landscape photography or any other image. The exposure of a photograph is absolutely vital, as it intertwines light and dark. Master it, and you’re on your way to taking great photos with fast shutter speed.
Imagine shooting a tranquil sunset, the sky ablaze in hues of orange and purple. With overexposure, your image becomes whitewashed, the colors barely discernible. With underexposure, it’s all just a black canvas with specks of light. To capture the sunset in all its glory you will need to strike the right balance. If done right. you will see a vivid palette of colours with exceptional detail. This is the magic of ideal exposure whether it is at a slower shutter speed or in less light.
Knowing how to control the amount of light that reaches your camera sensor is unquestionably a vital skill in photography. It’s the key to unlocking a myriad of possibilities in your images – adding depth, manipulating moods, or highlighting elements. With a grasp on exposure, you’re painting with enough light, crafting masterpieces on each shot.
The path to a stunning photograph begins with mastering the perfect exposure. It's the canvas upon which light and creativity paint their masterpiece.
Anonymous
Have you felt like your camera has a mind of its own when it comes to exposure? Well, the exposure triangle was designed to help you understand how the camera settings work as a unit. It’s like the secret code to capturing the perfect shot.
Meet Aperture – the camera’s eye! It’s the adjustable opening in your lens that regulates the light entering your camera, just like a pupil. Aperture settings are quantified as f-stops; a lower f-stop means larger aperture, and more light. The aperture setting you choose affects the depth of field. A wide aperture (like f/2) creates a shallow depth of field. This makes the subjects sharp while blurring the backgrounds, which is often used in macro photography. Conversely, a small aperture (higher f-stop value like f/8) creates a greater depth of field. This is perfect for landscape shots, rendering everything from near to far crisp and clear, beautifully. There is a function on your camera called Aperture priority.
Shutter speed plays the pivotal role of a timekeeper. It refers to the duration your camera shutter remains open. For instance, a shutter speed of 1/60 means the shutter is open for one-sixtieth of a second. Adjusting your camera shutter speed alters the exposure of your photo and can even add artistic flair. Slow shutter speeds allow more light, creating a brighter image and potentially capturing artistic motion blur. Conversely, faster shutter speeds reduce the light and can freeze motion and minimize blur, resulting in darker but crisp, sharp images.
ISO, a critical aspect of exposure, sets sensor sensitivity to light. If you visualize the camera as an eye, ISO signifies the eye’s adaptability to varying lighting. When intertwined with shutter speed and aperture, ISO assists in securing optimal exposure. Higher ISO values amplify sensitivity, but beware – this can lead to noisier, grain-filled images. Contrastingly, lower ISO settings are synonymous with clearer images due to reduced sensitivity. Low ISO is like reading in a well-lit room, while high ISO is needed for reading in dim moonlight.
Overexposure in photography happens when too much light hits the camera’s sensor, yielding overly bright and possibly washed-out images mainly due to a wide aperture or slow camera shutter. Different lighting conditions can also contribute to an overexposed image. Drawbacks of overexposure include lost detail and dynamic range, with highlights often blown out.
Consider these top features of overexposure:
| Pros of Overexposure: | Cons of Overexposure: |
| May create a dreamy effect | Lose detail in the bright areas |
| Emphasizes brightness and light | May wash out colors |
| Useful for artistic choice | Restricted dynamic range |
| Makes colours pop | Image looks unnatural |
| Highlights and stands out a subject | Difficult to correct post-editing |
Go beyond the surface of photography and truly comprehend how overexposure affects photos. Documenting the light and telling your story depends significantly on understanding and controlling exposure.
In photography, underexposure happens when too little light hits your camera’s sensor, resulting in a dark, possibly underdeveloped, underexpose image. It can occur due to a narrow aperture or a quick shutter speed. Underexposure can cause dark areas to lose detail, resulting in “crushed shadows,” increased noise, and reduced vibrancy. This gives your photos a muted and moody tone. Getting a grasp on underexposure and its impact on photo quality is essential for enhancing your photography skills.
Manual exposure in photography grants you total control of your picture’s look where you set the aperture, shutter speed, and ISO settings. This flexibility allows adjustments based on unique style and lighting conditions and creative objectives.
Here are some top features of manual exposure:
| Pros of manual exposure: | Cons of manual exposure: |
| Creative freedom | Requires practice |
| Tailored settings | Can be time-consuming |
| Enhanced image control | Requires understanding of exposure parameters |
| Better understanding of exposure | Possible non-optimal settings |
| Improves photography skills | High learning curve |
Automatic Exposure (AE) is a smart feature in photography that calculates and adjusts the exposure settings of your camera by analyzing the light in your scene. It’s admired for its instantaneous adjustments in fluctuating light conditions, simplifying the shooting process. Yet, tricky light conditions or creative intentions might warrant manual input to capture the perfect shot.
Tips for using AE:
| Pros of using AE | Cons of using AE |
| Quick Adjustments | Limited Creative Control |
| Convenience | Potential inaccuracy in Complex Lighting |
| Suitable for Beginners | Less Deep Understanding of Light and Shadow |
| Handles Simple Light Well | Can Cause Unwanted Blur |
| Good for Capturing Spontaneous Moments | Dependence on Camera Constraints |
Learning to get the correct exposure can be a real game-changer. Think of it as the ‘Goldilocks’ moment when everything aligns just right. Let’s walk through the art of achieving that perfect exposure every time. Whether you’re new to photography or looking to fine-tune your skills, you’ll soon discover the secrets of balancing aperture, shutter speed, and ISO like a pro.
Determining the right exposure for a photograph goes beyond just clicking a button. It’s a process requiring you to scrutinize the lighting conditions, subject matter, and desired results. The light meter, histogram, and exposure compensation on your camera serve as indispensable tools for adjusting exposure. Spot metering works great in uneven lighting, while bracketing helps when lighting conditions are tricky.
Key Features: – High-resolution LCD screen for clear and vibrant display
| Pros of Correct Exposure: | Cons of Correct exposure |
| Enhances photo quality | Requires practice |
| Give control over the final image | Might be challenging in variable light |
| Helps to maintain hard lighting situations | Can be time-consuming |
| Enables creativity in shots | Can require post-production adjustments |
| Improves photo results consistently | May necessitate advanced gear |
As photographers, our goal is to achieve the ideal amount of exposure. This often involves using an expensive, and frequently unavailable, light meter. But fret not, there are several smart hacks to achieve this. Let’s dive into them!
Getting the right exposure doesn’t have to be challenging. The Sunny 16 Rule suggests using f/16 for the aperture on a sunny day, with the shutter speed close to the inverse of the ISO. Utilize your camera’s histogram and always remember to use the exposure compensation to finely adjust the photo.
Key Features:
Sometimes the key to photography is simple: practice and perseverance. To understand exposure, hands-on experience is key. Each time you take a picture, you get closer to understanding what the correct exposure is.
Don’t be afraid to play with different settings. Adjusting the aperture, shutter speed, and ISO can drastically change the mood and feel of your photographs. Different camera settings can change how your subject is captured.
Exposure is not just about the technical settings – it’s also about feeling the photo. What about the lighting, subject, and composition? Practice shooting in different lighting conditions, with different subjects, and experiment with diverse layouts. You’ll quickly begin to see patterns of how exposure affects your photos.
For a more structured approach, consider conducting exposure experiments. Try capturing a series of images with varying settings and compare the results. Take note of what you like and dislike about each image. These notes will help you learn and improve your photography skills.
Making mistakes is part of the journey. Every unsuccessful shot provides insights, helping you refine your skills and taking you a step closer to achieving understanding exposure time. Keep experimenting, and most importantly, keep learning. With time and patience, your understanding about the definition of exposure will deepen, and your photography will become better. Remember, the road to perfection is paved with practice and perseverance. Exposure isn’t a set rule but a tool that helps you portray your creative vision. So, allow yourself the freedom to play around with it and who knows – you may surprise yourself with what you create.
Exposure is a subjective element in photography and should reflect your creative vision.
Anonymous
Mastering the art of photography exposure is an essential step in your journey as a photographer. Key concepts like the exposure triangle – the interplay of aperture, shutter speed, and ISO – play a crucial role in determining the quality and impact of your photograph. Each type of exposure, be it overexposure, underexposure or correct exposure, brings its unique flair and artistic voice to an image.
But remember, controlling exposure doesn’t come down to mere knowledge of these elements. It’s about experimenting with them, practicing, being persistent, and committing to learning, regardless of the challenges along the way. We’ve seen that the right exposure can transform a simple shot into an extraordinary image.
As you move forward, remember this: The art of photography exposure, like many creative endeavors, is a constant journey of discovery. Each photo you take brings you one step closer to understanding this dynamic and exciting world. So, grab your digital camera, brave those settings, take in the light, and capture the world as only you can see it. The art of exposure is not just a tool, but a passport to your own creative universe.
The primary elements of exposure in photography are aperture, shutter speed, and ISO. Three factors affect the amount of light that enters the camera, the duration of exposure, and the sensitivity to light. These factors determine the brightness, sharpness, and quality of the final image.
To control overexposure or underexposure in photography, adjust the exposure triangle elements aperture, shutter speed, and ISO. To fix overexposure, widen the aperture or increase the shutter speed. To fix underexposure, narrow the aperture or slow down the shutter speed.

Looking to kill off an hour while in Nanaimo, BC? Just a short hop-skip and

Photography can be a fulfilling and enjoyable hobby that brings a creative outlet to your

Welcome to our guide to Photoshop tutorials for beginners: A Complete Beginner’s Tutorial for Learning