The Charming Northfield Falls in the Heart of Beach Estate Park
Looking to kill off an hour while in Nanaimo, BC? Just a short hop-skip and
Demystify the intricacies of manual mode in photography. Master your camera by learning how to gain full control using manual mode camera settings and enhance your photography basics. Discover the art of shooting in manual mode and transform your snapshots into masterpieces. Join us on this journey to unleash your creative potential and navigate the exciting realm of photography with confidence.
Knowing how to use your DSLR or mirrorless camera’s manual mode can unleash more creativity in a photography-obsessed world. Shooting in manual mode gives you control over the exposure, rather than relying on the camera’s automatic settings.
When you first start using a camera, it’s easier to use the program or auto mode, ideally letting the camera choose the settings. These modes, including aperture and shutter priority modes, allow the camera to choose the best settings for the scene. However, switching to manual mode means calling all the shots yourself, especially when you want to use specific manual camera settings. In manual mode, you are not limited by automatic settings that adapt to the environment. Using manual mode camera settings, you can have full control over the ISO, aperture, and shutter speed, without any interruption from the camera.
The aperture is much like the iris of your eye — it controls the amount of light that enters the lens. Using a smaller f-stop (like f/1.4) in aperture priority mode widens the aperture, allowing more light in, resulting in a brighter image with a shallow depth of field. Conversely, in aperture priority mode, a larger f- number (like f/22) correlates to a narrower aperture, less light, and a deeper depth of field. Understanding this will help you create beautiful portraits with blurry backgrounds or landscape photos that are tack sharp from the front to the back. A smaller f-stop can creates a strong bokeh effect, while a longer aperture number (f-stop) maintains more focus in your image.
Shutter speed determines how long the camera’s sensor is exposed to light. The longer the shutter is open, the more light comes in, resulting in potential motion blur. A shutter speed of 1/500 sec freezes action, but is not ideal for low-light situations. Typically, speeds of around 1/20 – 1/60 sec are used. A lower shutter speed lets in more light but may cause blurring of the subject. On the other hand, high shutter speed allows less light but usually results in sharper images. Hence, managing shutter speed is essential to create effective motion blur or freezing actions.
ISO determines camera sensitivity to light, affecting image brightness. A low ISO (like ISO 100) results in less sensitivity and cleaner, sharper images but requires more light. High ISO, such as ISO 3200, makes the camera more sensitive to light and brighter. However, it may cause photos to pixelate due to noise when the lighting is low. Having control over your ISO is crucial for reducing ‘noise’ during nighttime photography or reducing brightness for daytime shots. Remember, it’s best to keep ISO as low as possible for cleaner images and raise it only when necessary.
The exposure triangle, consisting of aperture, shutter speed, and ISO, is the key to achieving a well-balanced shot. These three elements work together to determine how light or dark your photo is (exposure). Mastering this balance is the secret to manual photography – when one aspect changes, another must adjust to compensate. It’s all about finding the ideal compromise between these three settings for a perfect exposure.
Mastering the art of metering is essential for capturing well-exposed photos. The light meter in your camera measures the light and guides you to achieve the correct exposure. You can access it by pressing halfway down on your shutter button. Aim to adjust the light meter to 0 for a correct exposure, or slightly lower to preserve more highlight details. You can quickly adjust your light exposure using the top dial of the camera. Learning to read and manipulate your light meter is a fundamental skill for manual mode photography.
When you’re ready for full manual mode, look for ‘M’ on the dial of your camera. This mode is where you command all decisions related to aperture, shutter speed, ISO, and even white balance. Do not confuse it with semi-automatic modes like Aperture Priority or Shutter Priority; in ‘M’ mode, you’re in total control. To start manual mode photography, locate the ‘M’ symbol on the dial and to turn it. Remember, ‘M’ offers no safety net – it’s just you and your creative fire that guide the shots.
Most beginners start in auto ISO mode where the camera determines the ideal ISO based on lighting conditions. But when you’re ready for a more tailored approach, manual ISO is the way to go. This transition sounds intimidating, but it will give you much more flexibility and autonomy in your photography. Switching from automatic to manual ISO is an important move to better your exposure control and enhance your photography abilities.
Practice makes perfect, especially with manual photography. By shooting in various locations, both indoors and outdoors, you expose yourself to a diverse set of lighting conditions. This variety allows you to use your exposure triangle knowledge to adapt your settings accordingly. Remember, manual photography is all about understanding and manipulating light. As such, the more varied your practice environments, the wider your exposure experience will be. Therefore, never shy away from experimenting in different lighting conditions to distinctively master your manual exposure.
The path to mastering manual photography will be filled with shots that miss the mark — and that’s okay! Not every photo needs to be gallery-worthy. Even the best photographers take multiple shots at different settings before landing the perfect shot. Embrace the trial and error aspect of manual photography. Remember, it’s all part of your growth as a photographer. Failed shots can be the best learning tools in understanding the nuances of manual settings. Accept that not every photo will be perfect, and even a blurry photo will teach us something.
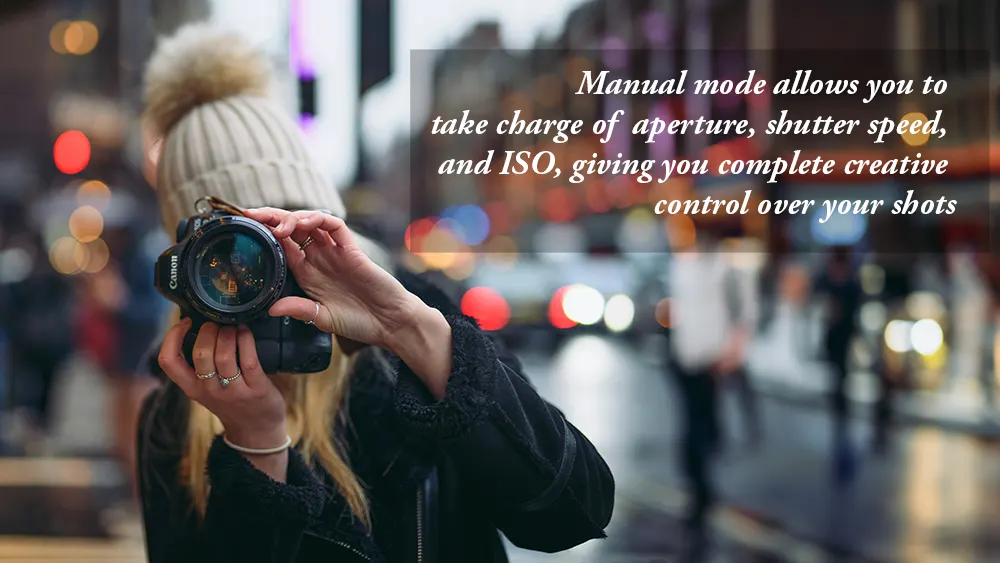
It’s a common misconception to equate manual mode with manual focus, but they are quite different! Manual mode allows you to control the exposure settings, such as ISO, shutter speed, and aperture. Manual focus allows you to adjust the lens to get a clear focus on your subject. You can use autofocus in manual mode or use manual focus in automatic mode. In photography, the terms ‘manual’, ‘mode’, and ‘focus’ have different roles. Beware not to mix them up!
Although manual mode provides more creative freedom, it is not always necessary to use it exclusively. In certain situations, using semi-automatic modes like Aperture Priority or Shutter Priority can be more practical and beneficial. This is especially true when dealing with changing light conditions or when speed is important. Why? Because they can help you maintain focus on your subject while the camera handles the exposure settings. To master photography, it’s important to know which mode works best in each situation. Don’t always use the same mode. Balance is the key!
For beginners, manual mode can seem daunting with its complex settings and the need for quick decision-making. Here are a couple of common issues and their solutions:
Remember, practice and patience are critical to overcoming these early hurdles. With time, you’ll gain a better grasp of these elements and how they coalesce to produce fantastic photographs.
Running into issues in manual mode isn’t uncommon. Here are some troubleshooting tips:
Remember, at the core of these issues is a fundamental imbalance in your exposure triangle. Rather than feeling overwhelmed, see them as opportunities to grasp the interaction between ISO, shutter speed, and aperture better.
Avoiding camera shake in manual mode can be achieved in a few ways. Using a tripod is probably the most reliable method. If that’s not an option, here are a few techniques:
Remember, few techniques can entirely prevent camera shake. The key is to reduce it as much as possible. Experiment, practice, and discover what works best for you to achieve sharp, blur-free images.
Is manual mode a must? Not always. Explore your camera’s versatile modes! Shutter Priority freezes action, Aperture Priority blurs backgrounds, and Program mode handles settings. Experiment and find what suits your shot best!”
Looking to master manual mode? Our comprehensive guide unlocks the secrets of perfect exposure, sharp focus, and creative control. Elevate your photography with our essential cheat sheet.
Looking to kill off an hour while in Nanaimo, BC? Just a short hop-skip and
Photography can be a fulfilling and enjoyable hobby that brings a creative outlet to your
Welcome to our guide to Photoshop tutorials for beginners: A Complete Beginner’s Tutorial for Learning