
Long Exposure Photography: Control Motion in Your Photos
Long exposure photography is a technique that uses slow shutter speeds to capture silky smooth
Share the Love This Valentine’s Day – 25% Off

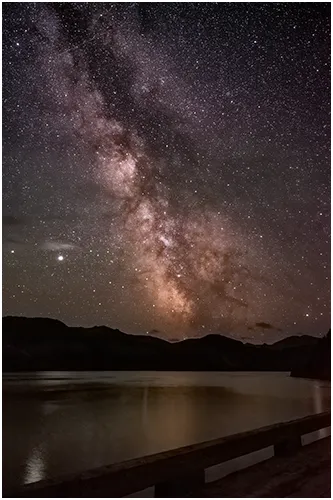
Are you standing under the vast night sky, camera in hand, feeling overwhelmed by the challenge of capturing the Milky Way’s splendor? You’re not alone. Many photographers find themselves lost in the cosmos, unsure how to immortalize that breathtaking stretch of space in a single snapshot.
With so many variables at play, from location and equipment to timing and camera settings, the secrets of successful Milky Way photography can seem as distant as the stars themselves.
Here’s an uplifting fact: The core of our galaxy is home to over 4 billion stars, each one a point of light waiting for your lens to pinpoint it against infinity. Your quest to photograph the Milky Way might appear daunting now, but fear not! This article is your guide through the galactic maze.
You’ll learn how to scout for dark skies free from blinding city lights, which gear will serve you best under those conditions, and how post-processing can elevate your images from earthly snaps to cosmic masterpieces.
Ready for an adventure through time and space? Let’s make some astrophotography magic happen!
When it comes to capturing stunning Milky Way images, understanding the basics is crucial. It is crucial to master the fundamentals of night sky photography, from the right equipment and locations to focusing techniques and camera settings.
Capturing the Milky Way requires specific tools. Choose your equipment carefully.
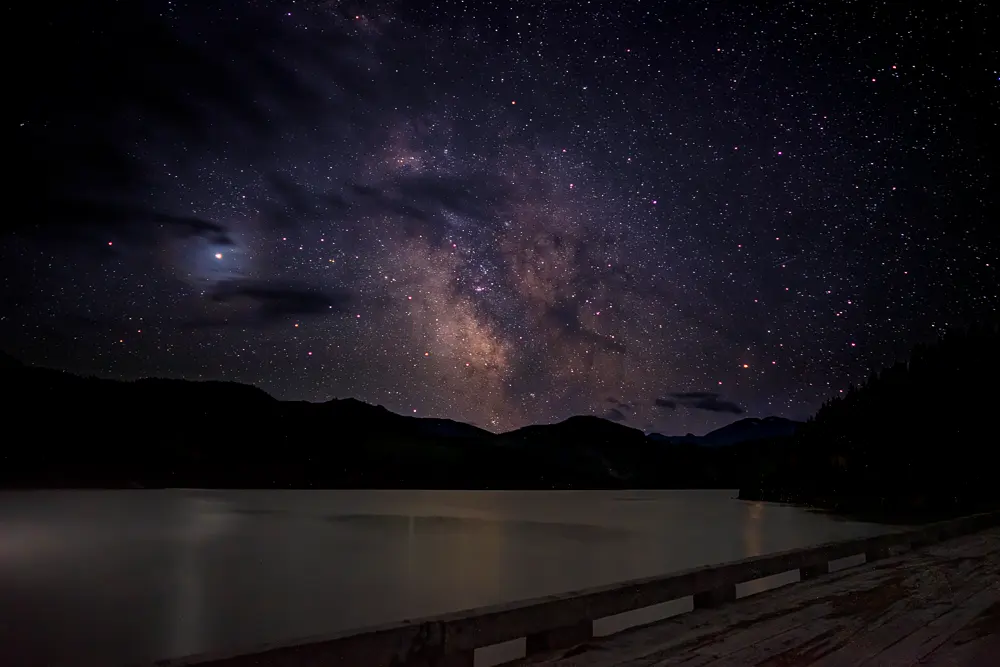
Finding the right spot is key. You want a dark sky away from city glow, so check a light pollution map before you head out. Look for areas recognized for their unobstructed skies and minimal light disturbance; this frequently entails venturing into the natural world, such as national parks, which serve as excellent spots to discover the Milky Way or rural regions.
To determine where the Milky Way will appear in the sky, use apps like PhotoPills or the free version of SkyPortal. This helps you plan the best time and place to set up your camera. Avoid nights when the moon is full, as it can wash out the stars.
Aim for new moon phases or days close by for darker skies that make our galaxy pop in photos!
Mastering your focus is key to capturing the Milky Way. Sharp stars and a clear sky will make your night sky images pop.
To capture stunning Milky Way photos, the right camera settings are crucial. Here’s a detailed list to help you dial in the perfect setup:

Looking to stretch your budget? We’ve got good news! Save an additional 10% use code bwild10
Incorporating foreground elements and utilizing image blending techniques can help elevate your Milky Way photography, adding depth and visual interest to your night sky images.
To create captivating Milky Way images, integrating elements is crucial. Choose a compelling subject to serve as the focal point of your composition.
This adds depth and context to your photo, making it more visually appealing. Experiment with different angles and perspectives to find the best placement for your foreground element in relation to the Milky Way core.
You can create stunning images that tell a story and draw viewers into the enchanting world of astrophotography.
Consider using an ultra-wide-angle lens (10-16 mm) to include more of the night sky and foreground in your frame. Position yourself so that the chosen element aligns harmoniously with the celestial arc.
Blend multiple exposures to create a balanced image. Start with the foreground, ensuring it’s well-exposed and sharp. Then, combine it with separate shots of the Milky Way. For seamless integration, align and blend these images using software like Photoshop or specialized astrophotography tools.
Utilize layer masks to selectively reveal sections of each exposure for a natural and captivating result using the right exposure. Adjust opacity to smoothly merge elements while retaining detail and contrast in both the foreground and celestial features, enhancing your final night sky compositions for that professional polish.
After capturing stunning Milky Way images, post-processing is essential to enhance the details and colours of your photos. Utilize software options like On1 Photo for editing techniques that will bring out the best in your night sky images.
Ready to take your Milky Way photography to the next level? Keep reading for more tips and techniques on mastering this captivating subject!
To edit your Milky Way images, you can use various software options. Here are some of the best ones available:
To achieve stunning Milky Way images, mastering editing techniques is crucial. Here are the detailed steps to enhance your night sky photographs:
With the right lens, star trackers, and long exposure techniques, you can take your Milky Way photography to the next level. The following advanced techniques will help you capture stunning images of the night sky, leaving viewers in awe.
Star trackers are expensive but can help you capture clear and sharp images of the Milky Way. These devices compensate for the Earth’s rotation, allowing you to extend the exposure time and maintain a fixed position relative to the stars.
As a result, long exposure shots don’t end up blurry due to star movement. By attaching a star tracker to your tripod and aligning it with the North Star, you can achieve stunning, pinpoint detail in your Milky Way photographs.
With this technique, you’ll capture breathtaking images that showcase the intricate beauty of our galaxy with unparalleled clarity and precision.
Capturing the stunning Milky Way involves mastering long exposures. Here’s what you need to know:

Download your free trial today!
Before heading out for a Milky Way photography session, it’s important to carefully plan your shoot. This includes checking weather conditions, scouting out locations during the day, and setting up your shots before dark.
These steps will help ensure a successful and productive night of capturing stunning images of the Milky Way.
Now let’s dive into scouting out locations for your next stunning picture of the Milky Way!
When preparing for a Milky Way shoot, it’s crucial to scout out the perfect locations. Consider these key aspects when looking for the ideal spot to take your first Milky Way photograph:
It’s crucial to be well prepared as dusk approaches. Here are the steps to set up your session before darkness sets in:
Common mistakes in Milky Way photography can include improper focusing techniques, misunderstanding exposure settings, and not planning for the right conditions. Avoid these mistakes by practicing proper focusing methods, learning about exposure settings, and carefully planning your shoot to capture stunning Milky Way photos.
To ensure sharp Milky Way photos, follow these focusing techniques:
To master Milky Way photography, you need to understand exposure. Here’s what you need to know:
In mastering Milky Way photography, you’ve learned about the essential equipment needed and the importance of location and light pollution considerations. You also discovered focusing techniques and camera settings crucial for capturing stunning night sky images.
Additionally, we have explored composition techniques, post-processing options, advanced shooting methods, planning tips, and common mistakes to avoid. Armed with these valuable insights and knowledge, you’re now well-equipped to embark on your own Milky Way photography adventures with confidence!

The best time to capture the Milky Way is during new moon nights in the Milky Way season, often from late spring through early fall, according to the photopills app.
Yes, you can photograph parts or even attempt to capture the entire Milky Way using a wide-angle lens on a full-frame camera for broader coverage.
Use apps like PhotoPills to plan your shot by pinpointing when and where the bright centre of our galaxy will rise, then set up your camera and compose your image.
Choose a fast wide-angle lens with a large aperture, like f/2.8, which lets in more light—perfect for capturing detailed images of the night sky, including stars in dark areas.
Set your focus to infinity, choose manual mode, and experiment with long exposures while managing noise by keeping ISO as low as possible without losing detail.
Taking good photographs requires practice, but following these tips and techniques can make mastering how to photograph our home galaxy easier even for beginners.
Long exposure photography is a technique that uses slow shutter speeds to capture silky smooth

The first time I went to the Medicine Bowls in Courtenay, it felt like a

Lower Myra Falls is one of those places in Strathcona Park that feels far more