
How to Backup Photos to the Cloud: A Step-by-Step Guide
Backing up photos to the cloud protects your memories from loss, damage, or device failure,
Grand Opening & Black Friday Sale = 50% Off

What is panoramic photography? Well! Just ask Filippo Blengini, who is credited with taking the biggest panorama ever created. He led an international team that shot an amazing 365 gigapixel image. What is it, you ask? A photo of Mont Blanc captured at 3500 meters above sea level. WOW!
To construct the expansive panorama of the Mont Blanc, the team spent two weeks in – 10ºC conditions gathering 70,000 images from different directions.
Panorama photography is both an art and a skill. It makes you see things differently. By combining multiple photos, you can tell a bigger story through your art.
A pano will take you to big places, busy cities, or amazing buildings. Making panaramics takes a lot of dedication and patience. But the end result is amazing.
Panoramic photography is a technique that captures images with horizontal or vertical elongated fields of view. Unlike standard photographs, which usually have an aspect ratio close to 4:3 or 3:2, panoramic images have a much wider ratio, often 2:1 or even wider. This allows the photographer to capture expansive scenes that would be impossible to fit into a single, standard frame.
Since the history of photography, photographers have loved panoramic photos. In the early days, multiple copper or glass plates were used to capture wider scenes.
There are many kinds of panoramas, each with its own look:
Knowing about these types helps you pick the right way to take photos. Whether it’s big landscapes or detailed buildings, you can choose the best method.

Looking to stretch your budget? We’ve got good news! Save an additional 10% use code bwild10
Panoramic photography has changed over time. It started with early daguerreotypes and has moved to today’s digital camera and cellphones. Let’s look at how it has changed and the new techniques that have made it better.
In the beginning, making panoramas was labour-intensive. Photographers shoot lots of photos and then spend hours stitching them together in the dark room. The Cirkut camera in 1904 changed everything. It could capture a 360-degree photo up to 20 feet in length.
Then came digital cameras that capture high-resolution photos, allowing you to get tons of details in your shots. Some cameras even have a panorama mode built in, meaning when you sweep your camera across the scene, it does the stitching.
My Sony camera does this, but the output is a JPEG, not RAW.
Pro-Tip
When photographers initially began taking panoramic photos, they did so out of passion. They were labour-intensive photographs. Well, that was then, and this is now! Thanks to the digital age, capturing those wide, sweeping views is easier than ever.
Let’s talk about panoramic heads. Attaching a panoramic head to your tripod ensures that the focal point remains precise. With a panoramic head, you’ll ensure all the photos line up perfectly. No more wonky edges or mismatched photos!
Software magic has simplified the process of stitching photos together. Just a few clicks will perfectly stitch together your 100 photos! The software blends everything into one seamless, beautiful panorama. It’s like having a photo wizard on your computer!
All these advancements mean that panoramic photography isn’t just for pros anymore. Whether you’re snapping pics of the Grand Canyon or just trying to fit your whole family in one shot, anyone can create stunning panoramas.
To take amazing wide-angle shots, you need the right gear. Let’s look at the key tools for making beautiful panoramas.
Panoramic cameras range from old film cameras to new digital ones. Today, many of us use DSLRs or mirrorless cameras with wide-angle lens to achieve those stunning panoramic images.
Tripods are key for steady and even shots. Choose strong ones with panoramic heads. They help keep your shots level and reduce errors when stitching images together.
| Equipment Type | Function | Examples |
|---|---|---|
| cameras | Capture Wide angle images | Cirkut, DSLR, Mirrorless |
| Lenses | Provide a wide field of view | 10-24mm, |
| Tripod Heads * | Remove parallax | Brands like Manfrotto and Nodal Ninja offer excellent heads. |
| Tripods | Ensure stability and consistency. | Brands like 3 Legged Thing and Vanguard offer excellent tripods. |
| Software | Stitch images together. | Adobe Lightroom, PTGui, Hugin |
Not everyone uses a tripod head; it's optional, and there is a bit of a learning curve to using one. But they are so worth it.
...Bob

Learning panoramic photography can make your wide-angle shots look amazing. Let’s look at the main things you need to know to make your panoramic photos stand out.
When taking panoramic photos, think about your composition, i.e., how you arrange the scene. When working with a photo of this particular shape, it is important to be mindful of how you position objects.
Use lines like roads or rivers to add depth. Use the rule of thirds by placing the horizon in the top or lower 3rds.
Place the important items in the photo in a way that makes people want to look at the whole picture.
Getting panoramic photos right is all about overlapping and stitching. Make sure each shot overlaps the next by at least 25–30%. This makes the photos blend together smoothly.
For wide shots, try taking your photos with the camera vertically. This can make your photos look even better.
Getting your camera settings right is key to shooting panoramic photos. The following are suggestions on where to start.
Panoramic stitching makes your vision come alive. This process is both an art and a science, needing detail and the right tools.
To begin, use panorama software like Adobe Photoshop or Hugin. These tools align your images by finding common points. They then blend the areas where they overlap for a smooth look.
Here’s a quick guide to successful panoramic photo editing:
During stitching, you might need to make manual changes. This could mean adjusting alignment or fixing exposure issues. The aim is to get a final image with no visible seams or distortions.
Remember, getting better at panoramic stitching takes practice. Don’t give up if your first tries don’t turn out. With time and practice, you’ll get the hang of it.
Zoom into your stitched photo to look for mix matches. The most common issues are going to be in the trees and their branches.
Pro-Tip
Panos can be used for many fields of photography.
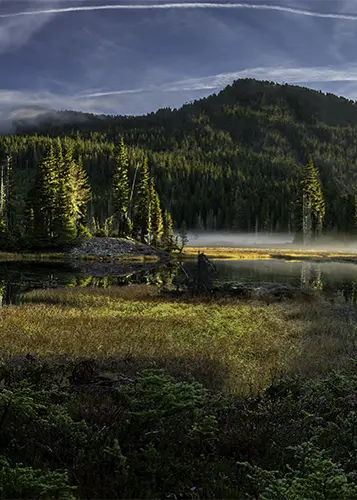
Panoramic landscape photography lets you show off big views. You can capture everything from huge mountains to endless deserts. It makes nature’s come alive.
Panoramic photography is ideal for landscape photography for a variety of reasons:
Want to see cities in a new light? Panos are great for showing the size and design of buildings.
Panoramic photography is a wonderful choice for architectural photography for several reasons:
For big groups, panoramic photos are perfect. They’re great for events like corporate meetings, weddings, or family get-togethers. Everyone can be in one big photo.
Panorama photography is also used in science, virtual tours, and history. It’s a flexible tool for many areas. It gives detailed visual records that regular photos can’t.

| Gene | Key Benefits | Ideal Subjects |
|---|---|---|
| Landscape | Captures vast natual beauty | Mountains, coastlines, forests |
| Architecture | Showcase entire structures | Skylines, bridges, interior |
| Events/groups | Large crowds | Wedding, conferences, reuniion |
Panoramic photography has its own set of challenges. These can test even the best photographers. Let’s look at these challenges and find ways to beat them.
Movement in your scene can lead to ghosting or blur in your panorama. To fix this, use faster shutter speeds. For example, if you’re shooting a busy street, aim for 1/250th of a second or faster.
This method freezes motion and keeps your panorama sharp.
Getting the right exposure in panoramas can be hard. As you move across a scene, the lighting changes. To deal with this, bracket your exposures.
Take several shots at different exposures for each part of your panorama. This gives you more options when blending images later.
When stitching multiple photos together, you might notice some weird distortions, like curved horizons or stretched objects. Don’t worry—these issues are pretty common; they can be fixed!
To overcome distortion, make sure you keep your camera level while shooting, use a tripod to maintain consistency, and ensure your photos overlap. When you’re stitching the images together, you can correct any distortions and get that perfect, seamless panorama.
Panoramic photo distortion is a big problem, especially in street scenes. Objects near the edges of your frame may look stretched or warped. Using a panoramic head can lessen this effect.
Panoramic photography’s popularity has grown over time. Now, it’s easier than ever to take those sweeping wide-angle shots.
But remember to do well; you need the right gear and skills. Make sure to adjust your camera settings, including focal length and aperture, and plan your shot. Practice to get better at stitching and handling movement and light while using manual focus.

The different types of panoramic images include horizontal panoramas, vertical panoramas, 360-degree panoramas, and spherical panoramas.
In photography, panoramic means capturing a wide-angle view, often by stitching multiple images together to create a broader perspective.
To take a panoramic photo, use your camera’s panorama mode, keep the camera level, and slowly pan across the scene. Ensure there’s overlap between shots for seamless stitching.
Set your camera to manual mode, use a consistent exposure, and disable auto white balance to avoid colour shifts.
A panoramic camera is used to capture wide, sweeping views of landscapes or cityscapes in a single image.
In panorama mode, start at one end of the scene, press the shutter, and smoothly pan your camera across the view until you reach the other end.
Backing up photos to the cloud protects your memories from loss, damage, or device failure,
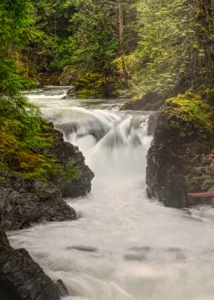
The first thing you notice at Little Qualicum Falls is the sound. Long before the
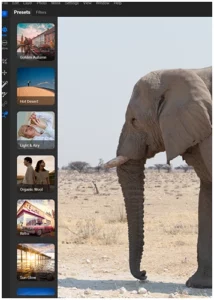
Did you know that more than 70% of photographers believe that editing software is essential