60-30-10 Rule in Photography: Colour Balance Guide
As a landscape photographer, I often find that waterfalls wrapped in mist and fog are
Grand Opening & Black Friday Sale = 50% Off

Have you ever thought about why some landscapes look magical? It’s the blue hour, a time between day and night. This brief period turns simple scenes into stunning stories with its unique light.
The blue hour happens twice a day, but you need to be quick as it only last for a short time.
This twilight moment is special revealing secrets that daylight conceals plus it adds an element of mystery. City-scapes glow with contrast, and nature looks serene and dreamy.
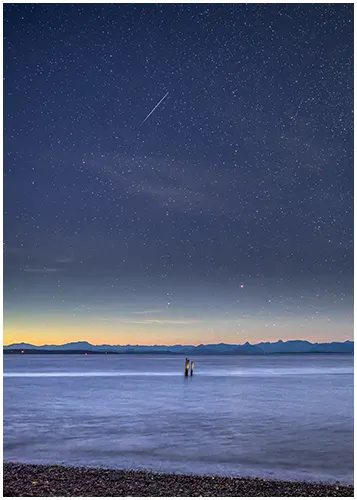
The blue hour is a special time between the golden hour and night. It’s when the sky turns a beautiful shade of blue.
When the sun is low in the horizon and still lights up the world in a unique way. OMG the sky turns deep blue, adding drama to your photos.
The blue hour is when ordinary landscapes become extraordinary, when cities transform into galaxies of light against a canvas of blue, and when photographers find magic in the twilight.
David duChemin
You have to be on the ball to capture the blue hour. It happens about 30-40 minutes BEFORE sunrise and AFTER sunset. The exact time changes with your location and the season.
The weather also affects the blue hour. Clear skies give a deep blue, while clouds add texture and reflects to city lights.
It’s the perfect time to capture photos that feel both peaceful and powerful.
We as photographers love both the blue hour and the golden hour. They offer different creative opportunities. Knowing the difference helps you choose the right time for your photos.
The golden hour has warm, yellow-orange light, while the blue hour has a cool, purple-blue feeling.
| Characteristic | Blue Hour | Goldne Hour | Impact |
|---|---|---|---|
| Timming | 30-40 minutes before sunrise or after sunset | First hour after sunrise and last hour before sunset | Different scheduling requirements for shoots |
| Colour Temperature | Cool blue tones | Warm orange/yellow tones | Creates different moods and emotional responses |
| Light Quality | Soft, diffused, even illumination | Directional, warm, creates long shadows | Affects composition and subject highlighting |
| Best Subjects | Cityscapes, architecture, water reflections | Portraits, landscapes, wildlife | Influences your choice of shooting location |
| Technical Challenges | Lower light requiring longer exposures | High contrast between highlights and shadows | Requires different camera settings and techniques |
The blue hour is excellent for city and architecture, with lights contrasting against the sky. The golden hour is better for portraits and landscapes, with its directional light.
Did you shoot both in one session?

Looking to stretch your budget? We’ve got good news! Save an additional 10% use code bwild10
Blue hour photography needs careful planning to capture its magic. Unlike some styles, blue hour rewards preparation. With only 20-30 minutes of perfect light, a good plan is essential.
Cityscapes are outstanding, with the artificial lights contrasting beautifully against the sky. Buildings, street lamps, and automobile trails add vibrant colours to your photos.
Waterfront areas are also excellent. Lakes, rivers, and oceans reflect the sky, doubling the beauty. Reflection adds depth and symmetry to your images.
Natural landscapes with captivating silhouettes are worth exploring. Mountains, trees, or rock formations create striking dark shapes against the purple-blue sky. Search for places with wide-open horizons and minimal light pollution for those natural blue tones.
Before choosing a location, check if it’s easy to get to and safe at night. Scouting in daylight helps you find hazards and great spots for photos.
As I stated before, blue hour timing varies by location and season. However, it’s always about 20-30 minutes BEFORE sunrise and AFTER sunset.
Mobile apps like PhotoPills and The Photographer’s Ephemeris are excellent for planning. They give exact blue hour times for any location and date.
Arrive 30 minutes before blue hour starts. This lets you set up, adjust your shot, and take a few test photos.
Planning might seem like extra work, but it makes a big difference. With the right location, camera settings, and timing, you’ll capture blue hour’s magic.
Blue hour photography is about mastering a few key techniques. Turning simple scenes into stunning images. The soft, diffused light is perfect for capturing beautiful shots. But, you need to know how to handle its unique challenges.
Let’s dive into the essential tips for making the most of this special time.
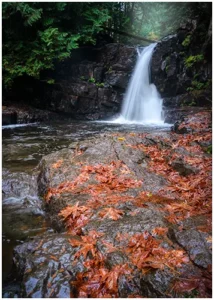
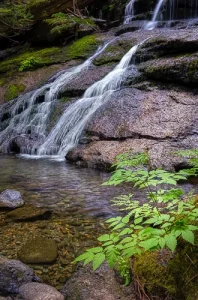
Long exposure photography is a must during the blue hour. The low light calls for longer shutter speeds. This opens up creative possibilities that are not visible during daylight hours.
To get those silky water effects or dreamy cloud movements, set your camera to shutter priority or manual mode. Use shutter speeds from 1 to 30 seconds. For even longer shots, try bulb mode.
Neutral density (ND) filters are key during blue hour. They reduce light, allowing for longer exposures. A 6-stop or 10-stop ND filter can turn moving elements into ethereal streaks.
Here are some shutter suggestions.
| Subject | Suggested Exposure | Effect | Filter |
|---|---|---|---|
| Flowing water | 1-5 seconds | Silky, smooth water surface | 3-stop ND filter |
| City traffic | 10-30 seconds | Light trails from vehicles | No filter needed |
| Moving Clouds | 30+ seconds | Streaking cloud patterns | 6-stop ND filter |
| Ocean waves | 15-30 seconds | Misty, ethereal water surface | 6-stop ND filter |
| Star trails | Several minutes | Circular star patterns | No filter needed |
Camera shake is a major enemy of acquiring tack-sharp photos during your blue hour photoshoot. Even a little movement can ruin a shot. A sturdy tripod is essential, not optional.
Choose a quality tripod that supports your gear without wobbling. Carbon fibre models are strong yet light, making them perfect for that long hike to the lake.
Here are more ways to avoid camera shake:
In windy conditions, lower your tripod and shield it with your body. The more stable your camera, the sharper your photos will be.
The magic of blue hour comes from natural and artificial light. The sky turns blue, while artificial lights glow warm.
Don’t just use existing light. Try adding a bit of spice with light painting. A small flashlight can light up foreground details in shadow.
Reflections enhance light sources during blue hour. Look for still water to mirror lights. Wet surfaces after rain can turn streets into colourful canvases.
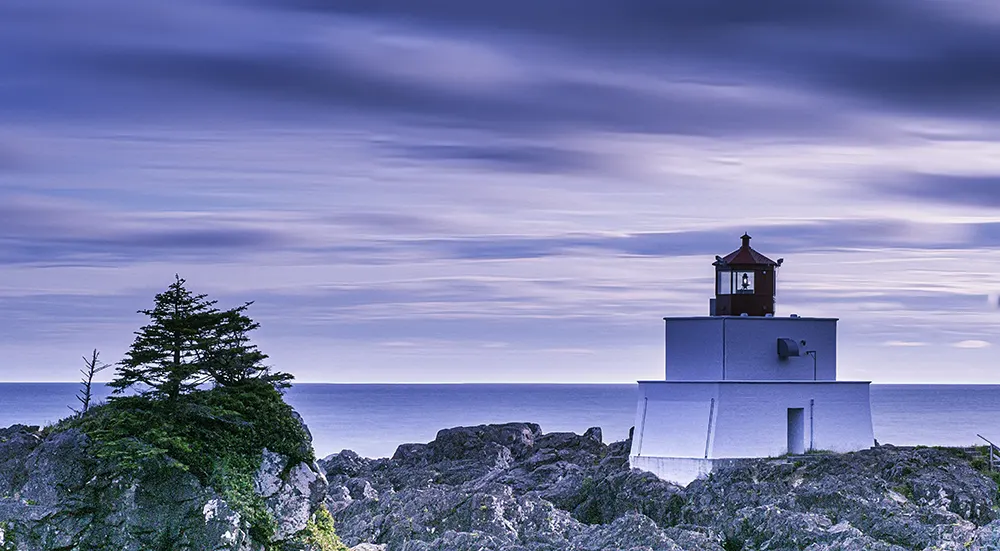
Lighthouses are compelling subjects for coastal scenes during blue hour. Their beams create dramatic compositions that show the essence of blue hour photography.
Blue hour photography requires special camera settings due to changing light. Start with these settings and adjust as needed:
Creating stunning photos is more than timing. It’s about composition and embracing the unique tones. During the blue hour, everything feels calmer and less busy.
While the blue sky is beautiful, adding interesting elements makes your photos compelling. Strong composition turns a simple shot into a captivating photo.
Look for elements to anchor your composition. Buildings, trees, or rock formations create silhouettes against the blue sky. They add drama and scale to your images.
Foreground elements are key in blue hour photography. They create depth and draw viewers in. Include reflective surfaces, textured elements, leading lines, and human elements.
The blue hour’s soft light highlights textures and patterns. It’s ideal for showing off these details. Position yourself to capture this subtle interplay between light and shadow.
The blue tones during this time create a unique mood in your photos. Instead of fighting them, work with these tones to enhance your images.
Complementary colours enhance blue light. Look for warm tones like yellow street lamps or red taillights. They create a striking contrast against the blue sky.
Be careful not to let the blue tones overwhelm your image. If it’s too blue, warm specific areas while keeping the blue hour feel. Balance is key: keep the magic while focusing on your subject.
Blue hour’s charm is rarely captured by a snapshot. Changing your perspective can transform your photos and reveal unique compositions.
Get low for drama. This stance highlights dramatic silhouettes or fascinating details. It suits buildings and landscapes.
Elevations give another appealing view. From above, we capture cityscapes with glittering lights against the blue. From above, patterns emerge that are not visible from below.
Use multiple perspectives during blue hour. Retake images from different angles as the light changes. First-time failures may become flawless as light advances.
Blue hour’s tranquilly and wonder encourage experimentation. Take your time, breathe peacefully, and experience familiar scenes differently. Unexpected angles produce some of the best images.
The blue hour is a magical time, but it comes with its own set of challenges. As the light fades, you and your camera face new challenges. Knowing these common mistakes can help you avoid disappointment and capture stunning images.
Getting the right exposure can be tricky. Your camera’s metering system might struggle with low light. leading to underexposed or overexposed shots.
Underexposure makes shadows dark and misses the blue tones. Overexposure blows out highlights and loses the sky’s blue.
Check your histogram after every shot. It shows if your exposure is right. Don’t trust your camera’s LCD screen in low light.
Keeping blue tones in check is crucial. It’s easy to overdo it; your camera sensors can exaggerate these tones.
Many try to shoot blue hour handheld but end up with blurry photos. Slower shutter speeds are needed for enough light, making camera shake a problem without a tripod.
Even with steady hands, camera shake is a problem at slow shutter speeds. This leads to blur in your images.
Without a tripod, you might raise your ISO to get more light. But this introduces noise and loses colour information.
A sturdy tripod is key for quality blue hour photos. It lets you use lower ISOs and longer exposures for cleaner, sharper images.
The light’s intensity and quality change as the sun moves. You’ll need to adjust your camera settings frequently.
Weather can also change suddenly, affecting the light and sky.

Blue hour photography needs patience and flexibility. The conditions change fast, and quick adjustments are key to capturing magical moments.
By avoiding these mistakes, you’ll improve your blue hour photos. The technical challenges are worth it for the unique images you can create.
Blue hour photography isn’t just about taking pictures, it’s about noticing a moment most people miss. For a short time each morning and night, the world shifts into something softer, cooler, and more magical.
The light wraps around buildings, reflects in water, and fills the air with a peaceful glow. It’s a time when colours mix, shadows smooth out, and everyday places suddenly feel like movie scenes.
By now, you’ve learned how to plan for it, how to set your camera, and what to watch for, from glowing city lights to mirrored reflections and dramatic skies. It takes patience and practice, but the results are worth every second.
Whether you’re standing on a busy city street or beside a quiet lake, the blue hour invites you to see your surroundings in a new way. And once you’ve captured it, you’ll understand why this tiny slice of time is one of photography’s best-kept secrets

Blue hour is so beautiful because the soft, diffused light creates a calm, dreamy atmosphere. The deep blue sky contrasts with warm artificial lights, adding depth and emotion to photos. This unique mix of tones makes everyday scenes look magical and visually striking.
The blue hour is unique for its soft, diffused light and rich blue tones. What makes the blue hour special is the mix of natural twilight and artificial lights, creating a calm, mysterious mood with low contrast, perfect for capturing dreamy, balanced photos.
As a landscape photographer, I often find that waterfalls wrapped in mist and fog are
Some places are easy to miss, even when you know the area well. Stokes Creek
As we get older, our colour vision changes, and the result affects our life, including