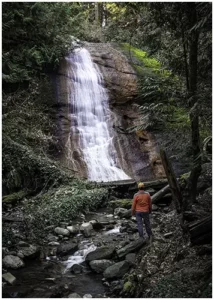
The Charming Northfield Falls in the Heart of Beach Estate Park
Looking to kill off an hour while in Nanaimo, BC? Just a short hop-skip and


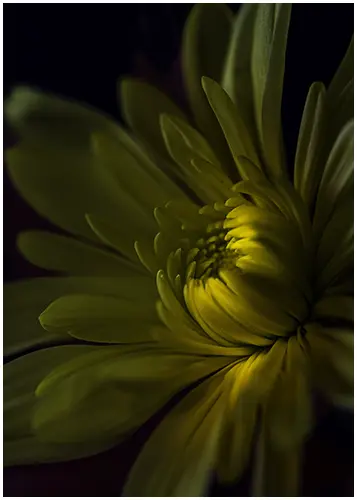
Discover the ideal settings for achieving breathtaking macro photos.
To capture stunning close-up photos with vivid colours and sharp details, it’s crucial to know the best camera setting for macro photography. One technique is to use a small aperture, which allows for greater depth of field, which is crucial for capturing the best macro shots. Based on my personal experience, even slight changes to the camera can impact the shot. Therefore, dedicating time and effort to selecting the correct settings will greatly enhance your results.
Let us help you improve your macro skills and capture breathtaking close-up shots with the help of this all-inclusive guide. Whether you are capturing flowers, leaves, insects, or objects within your home.
When capturing images at high magnifications, it becomes necessary to not depend on the autofocus capabilities of your lens. I understand the hesitation that comes with manually focusing, especially if you’re new to it but once you get the hang of it, it really makes a difference. Keep practicing, and you’ll start to see the benefits!
When it comes to photographing close-up, even the highest-quality lenses face difficulty achieving focus in auto. This applies to dedicated macro lenses and other standard lenses, which can also be adapted for stunning macro shots. Manual focus is preferred, as autofocus may introduce hunting while searching for the correct focus point.
When a camera and lens is having issues auto-focusing, dancing back and forth, we call this hunting.
Pro-Tip
When your lens finally locates a focal point, it is likely to differ from your desired focal point. In macro photography, the depth of field is typically narrow, requiring precise focus.
To tackle this issue, the key is to concentrate on manual focus. Fortunately, it’s not as challenging as it may seem! Just adjust your lens to MF mode (usually located on the side of the barrel), stabilize your camera body, and gradually rotate the focus ring on the lens until you achieve precise focus.
By practicing, you can improve your ability to concentrate effectively, resulting in an immediate increase in your success rate.
If you find it difficult to achieve the ideal focus point while working with high magnifications, rather than making adjustments to the focus ring, consider altering the position of the camera. In simpler terms, set the focus ring beforehand, and then gently move the camera forward and backward until you attain the desired focus!
When it comes to selecting the right shooting mode, you have two options: aperture priority and manual, both of which are crucial for achieving the best camera settings for macro photography. Both of these modes give you control over the aperture setting, allowing you to adjust the depth of field in your photos. However, there are some key differences between the two.
In aperture priority mode, you set the desired aperture value, and the camera automatically adjusts the shutter speed to achieve the correct exposure. This mode is great for situations where you want to prioritize controlling the depth of field, such as when shooting portraits or landscapes.
On the other hand, for macro photography camera settings, it’s often recommended to use a combination of a small aperture and a fast shutter speed. manual gives you complete control over both the aperture and shutter speed settings, giving us the option to use a higher ISO when needed to balance the small aperture. This allows for more precise adjustments but also requires a good understanding of exposure settings. Professional photographers often favour manual as it allows them to have complete control over their images, especially in macro photography, where precise adjustments are essential.
Ultimately, the choice between aperture priority and manual depends on your shooting style and preferences. If you’re just starting out, aperture priority mode can be a great way to learn about controlling depth of field while still having some automation. As you gain more experience and confidence, you can switch to manual for full creative control.
When shooting macro photography, it’s critical to have a camera that allows you to adjust the aperture, shutter, and ISO value.
When engaging in macro photography, the depth of field is typically only a few millimetres at high magnifications. As previously mentioned, it is important to maximize the use of this focused area.
An effective method to achieve this is by making precise adjustments to the aperture. This can involve utilizing a larger aperture for a more artistic appearance or a smaller aperture to ensure a fully focused subject. Nevertheless, the ability to customize the aperture, and consequently the depth of field, for each image is essential.
In my personal opinion, I find manual mode to be my preferred choice. One of the reasons is that I enjoy the intentional process of selecting both the F-stop and shutter speed. Moreover, manual mode proves to be useful in situations where the lighting conditions remain consistent; this allows for the option to set the desired settings, enabling the capture of numerous photos without concern for sudden exposure changes.
Aperture Priority can be a suitable option as well. It is a convenient mode to select if you are not fully confident with your camera’s configurations and is often suggested for novice photographers to avoid motion blur in their shots. Additionally, it is an advantageous choice when there is a rapid change in lighting or when transitioning between areas with different levels of brightness, such as moving from direct sunlight to shaded areas. This mode is also helpful when capturing swiftly moving subjects, like dragonflies swiftly moving from one branch to another.
Irrespective of this, it is important to adjust your aperture meticulously in order to attain the desired depth of field that aligns perfectly with your creative vision!
Live View is a feature on your camera that can help with your close-up photography. It is a feature that allows you to view a preview of your image on the screen at the back of your camera. This feature is particularly beneficial for macro photography, as it has a significant impact on the creative aspects of your shots.
To begin with, Live View provides the opportunity to assess your exposure prior to capturing the photo, ensuring that you are not unintentionally underexposing or overexposing. Your image, right from the start, can significantly benefit from the correct macro photography camera settings. If you are using a mirrorless camera equipped with an electronic viewfinder, you can achieve this by adjusting the viewfinder settings to mimic the exposure.
In addition, Live View provides the opportunity to verify the focal point. Achieving accurate focus on the desired subject is crucial for macro photography, and by utilizing Live View, you have the ability to zoom into the image on the LCD screen to confirm that the focus is neither in front nor behind the subject.
The Live View feature enables photographers to focus with certainty on a specific area of their subject.
When using a DSLR camera, Live View can help minimize camera shake and ensure your images are clear. Activating Live View causes the camera’s mirror to flip up instantly, preventing it from flipping up and causing vibrations when the shutter button is pressed; this is especially useful when camera stability is paramount.
The Live View enables us to compose shots from various angles, which is advantageous when using a camera with an articulating screen. By activating Live View, we can capture images from different angles effortlessly. This allows for the the creation of distinct and original compositions.
If you are someone who prefers not to use a tripod while shooting macro, this tip might be useful for you: keep your camera steady by using your body as a stabilizer (tuck your elbows into your sides). Burst mode can be a valuable resource for those who want to avoid the weight and limited mobility that come with using a tripod. You can learn more about burst mode and how it helps reduce motion blur in close-up photography here.
Burst mode is a function that instructs your camera to capture a series of photos when you keep the shutter button pressed. The speed of burst mode can vary depending on the camera model, ranging from a few frames per second to as high as 60, which is critical for capturing macro images without motion blur.
Burst mode, mainly utilized by wildlife and sports photographers for fast action shoots, is also an excellent setting for macro photography due to its ability to enhance focusing accuracy when shooting at extremely high magnifications.
When working at high magnifications in macro photography, achieving perfect focus can be challenging, even with the suggested settings mentioned above. This is where burst mode becomes useful, particularly for capturing macro images with reduced motion blur. Instead of capturing just one photo, which increases the risk of slightly missing focus, you can take a series of images while manually focusing on your subject. Although some of the shots may not turn out well, at least one is likely to match your vision, and you can delete the unsuccessful files later on.
Our buddy Don Komarechka, a renowned macro photographer, uses this technique, where he manually adjusts the focus and then gently moves the camera in a rocking motion while keeping the shutter button pressed down.
By the way, the burst-mode technique offers an additional advantage. By pressing the shutter button only once at the beginning of the burst, you can capture photos that are often sharp, even when using a slow shutter speed.
The self-timer feature enables you to press the shutter button and then wait for a brief period before the camera captures the image. At first glance, this feature may appear to be of little use, as one may not want to wait several seconds before taking a photo. However, it can prove to be quite useful in specific situations.
When shooting in low light with high magnifications, it can be difficult to capture sharp images. The strong magnifications in macro photography will enhance any camera shake, including the shake caused by pressing the shutter button, thus emphasizing the need to keep your camera stable during these shots.
Hence, it is crucial to reduce this problem to a minimum. An alternative solution is to utilize a remote release mechanism, which allows you to trigger the camera’s shutter using a different device, such as your mobile phone. However, remote releases come at an additional cost and can be inconvenient at times. They can be challenging to operate if you are handholding your camera.
I highly suggest utilizing the two-second timer on your camera. This option provides a brief delay before taking the photo. This delay allows any disruptive vibrations to settle, ensuring a clear and sharp photo, which is crucial when capturing minute details. Although it may be slightly inconvenient to wait those extra seconds, this short period of time often determines whether your image will be usable or blurry, underscoring the importance of a faster shutter speed in macro photography.
Utilizing the two-second self-timer will prevent you from being able to use the burst-mode technique mentioned earlier. In my personal opinion, when the lighting conditions are favourable, I prefer using the two-second timer.
Pro-Tip
By mastering these camera settings and techniques, you’ll be well-equipped to capture breathtaking macro photographs, transforming the ordinary into the extraordinary. By keeping these settings in mind while you’re out shooting, you can greatly improve the quality of your images.
Don’t give up if you encounter challenges with certain settings. Dedicate some time to practicing, and you’ll quickly become more comfortable with them.
For macro photography, use a low ISO setting such as ISO 100 or 200 to minimize digital noise and maintain image quality, ensuring crisp details and vibrant colours in your close-up shots.
For macro photography, evaluative metering is often preferred due to its ability to assess the entire frame, ensuring balanced exposures for intricate details in close-up shots.
To take macro photos with your DSLR, ensure you have a macro lens or extension tubes, select a shallow depth of field, use manual focus for precision, stabilize your camera, and experiment with lighting to capture stunning close-up details.

Looking to kill off an hour while in Nanaimo, BC? Just a short hop-skip and

Photography can be a fulfilling and enjoyable hobby that brings a creative outlet to your

Welcome to our guide to Photoshop tutorials for beginners: A Complete Beginner’s Tutorial for Learning