Long Exposure Photography: Control Motion in Your Photos
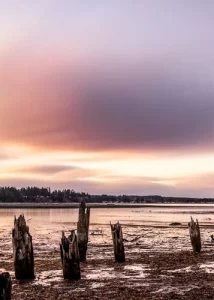
Long exposure photography is a technique that uses slow shutter speeds to capture silky smooth
Share the Love This Valentine’s Day – 25% Off


Have you ever stood at in the middle of a forest, feeling the humid air wrap around you like a warm embrace? It’s a place where nature’s heartbeat is alive with vibrant colours and intricate details. Yet, capturing this beauty through macro photography is a challenge.
As you prepare for this journey, consider your skills in depth in the field and manual focus. Techniques such as focus stacking can transform small subjects into stunning visuals. Remember, patience is key.
Taking macro shots in the forest offers a unique perspective on the mini-world. Your photos can reveal subjects we might otherwise walk past or overlook. Here are some tips to enhance your forest photography.
Natural light is often use in forest macro photography. Look for spots where sunlight filters through the trees. These areas can light up your subjects beautifully. As you know early mornings or late evening offer a softer light.
Misty conditions can also soften the light, making it perfect for capturing those wickedly small details.
Choosing the right macro lens can help your forest photography. But, do you know that you have options? Depending on your budget you can purchase a dedicated macro lenses, or look at close-up filters, or extension tubes.
When photographing small subjects such as mushrooms or bugs, be sure to get low to capture their intricate details. Look for these hidden treasures under fallen logs and mossy areas. Be patient and take time to appreciate the small things.
This approach can help you capture images that truly show the beauty of the forest.
Looking to stretch your budget? We’ve got good news! Use the SPECIAL code whosaid15 for an extra 5% off
Dialing in the right camera settings is essential for your macro forest photos. Knowing what camera settings to use will help you take incredible shots in this unique environment.
The following settings should help improve your photos’.
Stop down your aperture. I would start at an f/12 to f/22 for a good depth of field. This approach keeps your subject sharp, remember you’re shooting so close to the subject that a blurry background in inevitable. Try wider apertures like f/7.1 for creative effects.
Use shutter speeds around 1/100 sec. to freeze motion and balance exposure. Adjust these as light changes.
Keep your ISO low, around 100 or 200, to avoid noise in your photos. This is key for clear shots, even in the dim forest. If it’s very dark, you might need to raise the ISO a bit. But be careful, as higher ISOs like 1600 or 3200 can add noise in the shadows.
Manual focus is best for high magnifications to avoid mistakes. Auto focus might not work as well. Use your cameras two-second self-timer or remote shutter release to reduce camera shake. Live View helps you check focus and composition before taking your photo.
Knowing how to adapt to the forest low light can improve your shots. Techniques like using off-camera flash or a flash-ring. can help
Using an off-camera flash in forest photography offers many benefits. It gives you more control over lighting, which can be difficult in a forest’s dim and changing light.
Here’s a quick look:
Control Over Light Direction and Quality:
Forests have uneven lighting due to dense trees, causing harsh shadows and deep shade. An off-camera flash lets you direct light exactly where needed, filling in shadows or highlighting subjects.
You can change the light’s quality with diffusers, soft-boxes, or reflectors. This creates softer, more natural-light.
Separation of Subject from Background:
depending on where you place the flash, you can make your subject pop against the background. This adds depth and makes your subject stand out.
Overpowering Ambient Light:
When ambient light is weak or has unwanted colours (like green from trees), an off-camera flash lets you add your own light. Ensures your colours and exposure is perfect.
Creating Dramatic Effects:
Off-camera flash opens up creative lighting options. You can use rim lighting, side lighting, or back lighting to add drama and interest to your macro photos.
Macro Photography Benefits:
In short, an off-camera flash lets you control light in ways an on-camera flash or natural light can’t. This results in more professional and engaging forest photos.
Getting down low offers unique views. It shows your subject’s details and the surrounding landscape. Low angles add depth and story to your macro photos.
Pair this with the right lighting, and you’ll get wonderful forest photos.
Dialing in the right camera settings are essential for low light. Closing your aperture to let in more light. Raise your ISO to 800-1600 for better results without too much noise.
Using a tripod can greatly improve your macro photography in the forest. It helps keep your shots sharp, even when there is a lack of light.
Stability is why use need a tripod. It’s crucial for capturing fine details. A sturdy tripod lets you use slower shutter speeds without losing image quality.
When using small apertures like f/16, stability is even more important. A tripod ensures tack sharp photos, even at high magnifications.
While tripods are great, and I swear by them, there are times when you need to go handheld. This is especially true when you’re on rough terrain or when your subjects is move quickly.
Setting up a tripod on the forest floor can be difficult at times. Look for level ground to start.
With these tips, setting up your tripod will be a lot easier.

Starting a forest macro photography journey reveals a world full of unique subjects. The forest floor is teeming with life, from plants to tiny insects. Look for rare fungi or insects blending in with their surroundings, offering stunning macro shot .
Patience is crucial when searching for subjects. Take your time exploring the forest floor, noticing details like morning dew on webs or insects. These elements add depth to your photos.
Look for unique shapes and colours that enhance your photos. Additionally, walking in your local parks can uncover macro hot-spots within your area.
The sounds of nature can guide you to wildlife subjects. Listen for chirping grasshoppers or specific plants to identify insects. For example, look for milkweed to spot milkweed beetles.
Approach subjects slowly and gently. This helps avoid startling them, increasing your chances of a great shot.
Nature is full of textures and patterns, perfect for macro photography. Notice the designs on leaves or the bark of trees. Playing with depth of field can create beautiful, dreamy shots.
Focus on groups of elements, like pairs or threes, to draw attention. The more you explore, the better you’ll discover interesting subjects.
The forest is alive with unseen wonders—exploding with colour, texture, and tiny dramas that most never notice. Your macro lens is the key to unlocking this secret world. Get ready to:
Dominate depth of field—blast your subjects into sharp focus while the background melts into a dreamy blur.
Battle the shadows with off-camera flash to reveal nature’s hidden details.
Go full ninja mode—crawl, climb, and contort for killer angles no one else gets.
This is your call to adventure. The forest floor is your studio, every leaf and insect a potential masterpiece. Forget “pretty pictures”—we’re hunting frame-worthy moments that scream WOW.
The forest is waiting. Your lens is loaded. Now go shoot something epic.
The principle of macro photography is capturing extreme close-up images of small subjects, making them appear life-sized or larger on the sensor. It requires specialized lenses (macro lenses) or techniques to achieve high magnification (typically 1:1 ratio) while maintaining sharp focus and detail, often with shallow depth of field for artistic effect.
A macro photo captures extreme close-up shots of small subjects, making them appear life-sized or larger. Key elements include high magnification (1:1 ratio or higher), sharp focus on tiny details, and minimal focusing distance. Macro photography often highlights textures, patterns, and intricate details invisible to the naked eye
The best focal length for forest photography depends on your scene: 24-35mm for wide-angle shots capturing vast landscapes, 50-85mm for intimate details, and 100mm+ for compressing layers in dense forests. A 24-70mm zoom lens offers versatility. Use wider apertures (f/2.8-f/4) for low light and sharper focus

Long exposure photography is a technique that uses slow shutter speeds to capture silky smooth

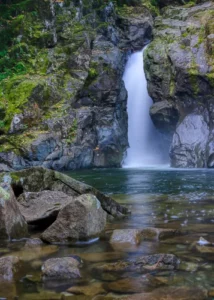
The first time I went to the Medicine Bowls in Courtenay, it felt like a

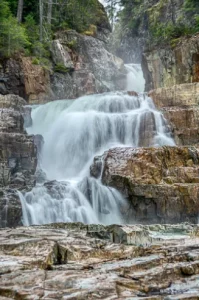
Lower Myra Falls is one of those places in Strathcona Park that feels far more