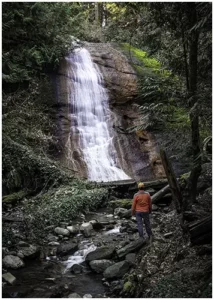
The Charming Northfield Falls in the Heart of Beach Estate Park
Looking to kill off an hour while in Nanaimo, BC? Just a short hop-skip and


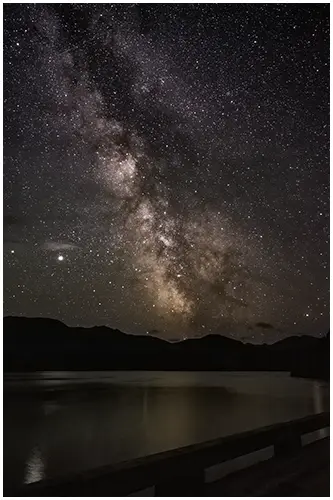
Long exposure night photography has the power to transform ordinary scenes into breathtaking night sky art. With the right techniques and equipment, you can photograph stunning light trails and photos of the night sky. Night photography provides endless, nay infinity creative possibilities for both experienced and beginner photographers.
In the realm of photography, night photography has a unique allure. It allows photographers to capture the night sky by manipulating light and time, resulting in stunning photographs. Long-exposure photography has endless creative possibilities by revealing the rich textures and mysterious beauty hidden in the darkness.
The darkness hides the beautiful textures that are normally overlooked. Shooting at night reveals intricacies that the human eye cannot observe. Use this blackness to capture images of the night sky’s hidden details.
In order to capture stunning long-exposure night photographs, proper pre-shoot preparation is essential. This guide will help you have a successful shoot. It includes steps for location scouting and a checklist of essential equipment. By using these proactive measures, you can maximize your chances of returning with some great photos.
Prior to your photography session, it is crucial to scout your location in advance. By familiarizing yourself with the surroundings, you can identify the best spots for light trails and night sky photos. Look for areas with interesting subjects and unique compositions. Consider the availability of natural and artificial sources of light to add depth and creativity.
Consider the safety and accessibility of the location. Pay attention to any potential hazards or obstacles that may hinder your ability to capture the shots. Scout during the day to understand the layout and potential obstacles.
Equipping yourself with the right tools is crucial for successful long-exposure photography. Here is an essential equipment checklist to ensure you are well-prepared:
| Item | Description |
|---|---|
| Sturdy Tripod | A stable tripod is essential to keep your camera steady during long exposures, minimizing shake and ensuring sharp images. |
| Remote Shutter Release | The remote shutter release reduces camera shake, resulting in smoother and clearer shots. |
| Wide-Angle Lens | A wide-angle lens is ideal for capturing expansive night scenes with more light and detail in the photos, making it a staple for landscape photography under the stars. |
| Neutral Density Filters | Neutral density filters reduce light for a longer exposure. |
| Flashlight or headlamp | A flashlight or headlamp will assist you in navigating the location and adjusting camera settings in low-light conditions. |
| Spare batteries and memory cards | Carry spare batteries and memory cards for your night session. |
In this section, we’ll learn about camera settings and techniques for capturing beautiful long-exposure night photos. Learn how to use different camera settings to capture stunning long-exposure night photos.
One of the key elements in long-exposure night photography is shutter speed. By adjusting the shutter speed, you can create ethereal effects and capture captivating light trails. A slow shutter speed is normally a few seconds to several minutes, allowing for the movement of light to be recorded over time and adding a sense of motion.
To determine the right shutter speed for your desired effect, consider the speed and pattern of the subject. For light trails, slower shutter speeds are generally preferred to ensure longer trails. Experiment with different shutter speeds to achieve the desired level of light streaks and motion in your photographs. Remember to use a tripod or stable surface to prevent camera shake during longer exposures.
When taking long-exposure night photos, it’s important to adjust the aperture and ISO settings to control the amount of light entering the camera, often opting for more light and a longer exposure time. The aperture controls the amount of light that passes through the lens by adjusting the size of the aperture opening. A wider aperture (lower F-Stop) lets in more light, making the images brighter. Conversely, a narrower aperture (higher F-Stop) restricts the light, making the photos darker.
The ISO setting determines the sensitivity of the camera’s sensor to light, with ISO 100 often being a preferred setting to reduce noise. Higher ISO values increase the sensor’s sensitivity, enabling you to capture brighter images in low-light conditions. However, higher ISO settings also introduce noise or graininess to the photographs. Finding the right balance between aperture and ISO is crucial to achieving well-exposed photos without excessive noise.
When photographing shadowy landscapes, consider using a narrower aperture (higher f-number) to maintain sharpness and depth of field. Using a specific technique will make both the main subject and the background clear in the photo, capturing more details. Combine this with a moderate ISO setting to minimize noise and achieve a balanced exposure.
| Camera Setting | Recommended Value |
|---|---|
| Shutter Speed | Varies based on the desired effect and subject movement. Experiment with different speeds, ranging from a few seconds to several minutes. |
| Aperture | Narrower aperture (higher f-number) to maintain sharpness and depth of field. Recommended range: f/8–f/16. |
| ISO | Adjust the ISO setting to a moderate level in order to reduce noise. Recommended range: ISO 800-1600 Test this theory with your camera. |
In long-exposure night photography, selecting the right subjects is crucial for creating captivating and visually striking photos. The choice of subject can add interest, depth, and narrative to your photographs, elevating them from ordinary to extraordinary. When capturing long exposures under the stars, consider the following:
Composition plays a vital role in transforming ordinary scenes. By applying certain techniques and principles, you can enhance the visual impact of your photographs.
From focusing in low-light scenarios to dealing with noise and movement for tack sharp photographs, these techniques will help you capture stunning images even in challenging conditions.
Focusing can be particularly challenging in low-light scenarios, but there are several techniques you can use to achieve sharp photographs.
Noise and movement can be challenging, but there are techniques to minimize their impact and capture clear images.
Applying these focusing techniques, along with noise reduction and longer exposures, will empower you to conquer the obstacles presented by low-light situations and capture breathtakingly clear night photos.
| Challenge | Technique |
|---|---|
| Focusing on low-light scenarios | Manual focus, live view, and zoom functions |
| Dealing with noise and movement | Noise reduction, longer exposures |
Once you’ve captured your breathtaking night shots, the journey doesn’t end there. Incorporating foreground elements and adjusting the frame can add a compelling dimension to your night photos. Post-processing is a crucial step in enhancing and perfecting your nighttime images. With the right editing techniques, you can take your art to another level, showcasing the true beauty of the night.
When editing your long-exposure night shots, there are a few key adjustments you should consider. These settings will help you bring out the details, enhance the mood, and create stunning visuals:
Besides adjusting basic settings, here are some software tips and techniques to improve your long exposure night shots:
By applying these suggested settings and software tips, you can improve your long-exposure night photos and emphasize the true beauty of your long exposure images.
Capture mesmerizing night scenes with long-exposure photography. Set your camera on a sturdy tripod, choose a low ISO, and adjust the aperture for the desired depth. Use a remote shutter release and experiment with exposure times to reveal stunning details in the night sky.
To prevent star trails in night photography, it is essential to follow the rule of 500, which determines the maximum exposure time. Divide 500 by your lens focal length to find the longest shutter speed (in seconds) without noticeable star movement.
What ISO should I use for long-term exposure? Opt for a low ISO setting, like 100 or 200, to minimize noise in long-exposure photography. Lower ISO values produce cleaner images, ensuring optimal quality for your shots.

Looking to kill off an hour while in Nanaimo, BC? Just a short hop-skip and

Photography can be a fulfilling and enjoyable hobby that brings a creative outlet to your

Welcome to our guide to Photoshop tutorials for beginners: A Complete Beginner’s Tutorial for Learning