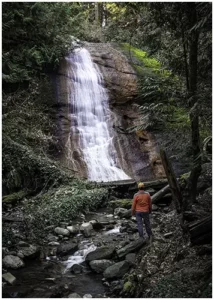
The Charming Northfield Falls in the Heart of Beach Estate Park
Looking to kill off an hour while in Nanaimo, BC? Just a short hop-skip and


Mastering the technique of focus stacking in Lightroom and Photoshop is essential to create stunning, intricate images that will leave a lasting impression. Create photos with a greater depth of field and sharp focus by combining images with different focus points.
And the best part? It’s easy to do! Read on as we take you through an easy step-by-step process of creating extraordinary focus-stacked images.
Focus stacking is a technique that combines multiple photos with different focus points. It creates images with improved depth of field and sharpness. To execute this technique, you can use software like Lightroom and Photoshop. They have the options to align your focus-stacked images accurately.
Lightroom and Photoshop are both excellent software options for focus stacking. While Lightroom allows you to do basic adjustments, Photoshop offers more advanced features. By using both software in conjunction, you can achieve seamless stacked photos and accurate colours throughout your image.
Focus stacking is a technique that requires some practice to master. It may seem daunting at first, but fear not. We’re here to guide you through the process step by step. Whether you’re experienced or a beginner, these tips will help you master focus stacking and capture detailed photos..
To ensure a successful focus stacking process, it is crucial to first capture the photographs that will ultimately compose the final image. To keep photos organized, I always take the first photo in the group with the closest focal point. The rest of the photos have slightly different focus points.
Whether shooting Macro or landscape photography, I use a tripod to ensure that each photo in the stack lines up perfectly. A tripod will also help you keep your camera level and avoid unwanted camera movement.
In addition to using a tripod, it’s also important to shoot in RAW. This allows for more flexibility in post-processing and ensures that your final image has the highest quality possible.
Once you have captured the necessary photos, it’s time to move on to post-processing. In the next section, we will walk you through a step-by-step guide on how to stack in Lightroom and Photoshop.
Now that you have captured the images you want to stack, it’s time to bring them into Lightroom and start the focus stacking process. Lightroom offers powerful tools that allow edit your photos seamlessly, making it an ideal choice for creating focus-stacked images. Here’s a step-by-step guide:
To refine the focus stacking effect further, you can use layer masks in Photoshop to blend specific areas of each layer to achieve the desired result. Once you’re happy with the final image, save it and it will automatically transfer back Lightroom as a new file and apply any presets you have.
When capturing images for focus stacking, using manual focus can be a game-changer. You can choose the exact focus point for each image in the stack, giving you complete control over your final result.
Manual focus is the best option for photographers who want to create impressive, deep and detailed images using focus stacking techniques.
Now I know the new Mirror-less Nikons have a option in the menu for focus stacking, So Manual Focus may not be required. But not everyone owns a Nikon, Katherine!
In the world of landscape photography, focus stacking can be your secret weapon for those vast sweeping scenes. You have the power to select precisely where your focus point lands in each image of the stack. This technique captures all the details, from the foreground to the mountains, giving your photos more depth. Say goodbye to blurry foregrounds or hazy backgrounds.
Macro photography is where focus stacking truly shines. When you’re up close and personal with tiny subjects, achieving that razor-thin depth of field can be a challenge. Focus stacking comes to the rescue, allowing you to meticulously control your focus points.
Using manual focus in this scenario is like having a precise tool that ensures each element in your stack receives the attention it deserves. The result? Incredibly detailed macro images that showcase the intricacies of your subject without compromising on clarity or depth. It’s a match made in photography heaven.
When taking multiple photos for focus stacking, be sure to focus on different areas of the subject in each shot. This will give you a broader range of focus points to work with when combining the images.
| Technique | Description |
|---|---|
| Manual Focus | Allows you to select the exact focus point for each image in the stack. |
| Macro | Useful for capturing highly detailed images with a shallow depth of field. Consider using focus bracketing to ensure precise focus. |
| Different Focus Points | Be sure to focus on different areas of the subject in each shot to give you a broader range of focus points to work with. |
| Image’s Position in the Stack | Experiment with the order in which you stack the images to see which produces the sharpest focus-stacked image. |
Understanding these key concepts will help you create focus-stacked images that showcase your subject in the best possible way. With practice, you’ll be able to master the art of focus stacking in Lightroom and Photoshop, create stunning, detailed photos every time.
While Lightroom offers powerful tools for, you will require the use of Adobe Photoshop. However you don’t need lightroom to stack the photos. You can use Bridge if that is your preference.
Our goal in this extensive guide to mastering focus stacking in Lightroom is to ensure you gain a deep understanding of this technique and its benefits. Using Lightroom and Photoshop’s tools you can improve the tones and colours in your focus-stacked images, ultimately making better photos.
Remember, capturing the right images is only part of the process. Post-processing plays a crucial role in creating a final image that truly stands out. With the step-by-step guidance provided in this guide, you can stack images and bring your focus stacking vision to life.
There’s nothing more satisfying than seeing your hard work pay off with a sharp, detailed focus-stacked image. By using focus stacking techniques like manual focus, focus bracketing, and positioning the image in the stack, you can enhance your focus-stacked images.
Focus stacking in Lightroom is a technique that allows photographers to combine multiple images with different focus points to create a final image with greater depth of field and sharp focus throughout.
Photographers use focus stacking to achieve a greater depth of field and ensure that everything in the image is in sharp focus. This technique is particularly useful in macro photography or when capturing landscapes with a shallow depth of field. ( F/6)
To capture images for focus stacking, it’s recommended to use a tripod to ensure that each image in the stack aligns perfectly. Additionally, we will provide a step-by-step guide on how to capture the necessary photos for focus stacking, whether you’re shooting macro or other subjects.
The process of focus stacking in Lightroom involves stacking and aligning photos seamlessly, adjusting the focus, and using layer masks to blend the images together. Lightroom Classic offers specific features and capabilities that make it an ideal choice for focus stacking.
Yes, you can take your focus stacking to the next level by utilizing the advanced features of Adobe Photoshop. We will show you how to transfer your stacked images from Lightroom to Photoshop, where you can further refine and enhance the focus stacking effect.
Mastering focus stacking techniques involves understanding the importance of manual focus, focus bracketing, determining the image’s position in the stack, and using different focus points. These techniques will help you create focus-stacked images that showcase your subject in the best possible way.

Looking to kill off an hour while in Nanaimo, BC? Just a short hop-skip and

Photography can be a fulfilling and enjoyable hobby that brings a creative outlet to your

Welcome to our guide to Photoshop tutorials for beginners: A Complete Beginner’s Tutorial for Learning