Cumberland China Bowls Hiking Guide on Vancouver Island
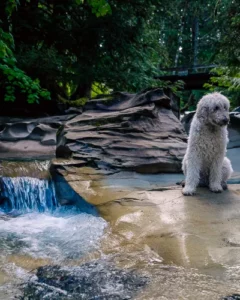
One of my favourite quick hikes near Cumberland is the Cumberland China Bowls, also known

As a beginner photographer, there are a few key settings you should be familiar with when bracketing photos. Here are a few to keep in mind:
It’s important to note that not all these settings will be used while bracketing photos, and some cameras have different ways of adjusting the settings. So, it’s always a good idea to familiarize yourself with your camera’s manual and settings.

When bracketing, selecting between manual mode or aperture priority mode is an important decision. It will determine how much control you have over your exposure settings, and ultimately the quality of your photos.
It’s important here not to change the F-Stop settings. You want to photo to have the same depth of field throughout this process.
Ultimately, the best option for you will depend on your skill level and desired results.
Use your camera’s recommended exposure settings to get the best results. Here is a step-by-step guide to selecting the recommended settings:
Check your histogram for all three shots. It should be different for each photo.
I believe the best approach is to take 3 photos, 1 properly exposed and then an overexposed and an underexposed photo. You will need to take at least three photos with varying exposures.
First, take one photo of the “best” natural exposure. Your camera’s light meter should be set to Weighted-Average metering for this series.
Next, take a photo slightly underexposed. Use a negative exposure, such as -1/3EV. This ensures the image is slightly darker than what your camera’s light meter suggests.
Finally, take a photo slightly overexposed. Use a positive exposure, such as +1/3EV. This image should be slightly brighter than what the camera’s light meter suggests.
Once you have taken the three photos, you can compare them to see which one has the ideal exposure for your needs. If needed, you can also combine all the images with their varying exposures into one image using Lightroom or Photoshop.
By taking three photos with different exposures, you can make sure your final image is properly exposed and capture the scene in the best way possible.
If you feel the need to take additional photos. Don’t be afraid. You are not limited to 3 photos; you can take 5 or 7 or more.
This technique is great for landscape. Why? Landscapes don’t move, therefore you can take your time shooting a landscape with different exposure levels.
You could start by setting your camera to Aperture Priority mode, compose your shot and take one photo with the default exposure settings (EV0). Then, dial in +1 exposure compensation for the overexposed image, and -1 exposure compensation for the underexposed image, and take two more photos.
Finally, observe your scene and check the histogram for any spots of overexposure and underexposure. If your scene still has a significant dynamic range that isn’t fully captured, you could capture additional images at +2/-2 stops, +3/-3 stops, and so on, until the desired results are reached.
Exposure bracketing can increase your chances of capturing a well-exposed photo. This technique captures three or more frames, with the photo exposed for the highlights, mid-tones, and shadows.
By merging the different photos in post, you can produce a full tonal image. Exposure bracketing is especially useful when dealing with difficult lighting conditions, such as shooting landscapes during the golden or blue hour. Bracketing photos is a low-risk, high-reward skill for capturing moments that cannot be recaptured.
Exposure bracketing can create HDR images by taking multiple photos of the same composition at multiple exposures, then blending them together in post-processing software. Here is a step-by-step guide on how to achieve this:
By following these steps, you can use exposure bracketing to create High Dynamic Range (HDR) images with richer details and a more realistic look.
Exposure bracketing is a method of taking multiple photographs of a scene with varied settings, (like shutter speed and aperture) to optimize the exposure of the scene. This practice helps to ensure that photographers have captured the best exposure possible, creating a more dynamic and interesting photograph. This technique can also be used to create HDR images, which provide a larger tonal range to create a more dramatic look. Additionally, focus bracketing can be used to combine multiple frames that have different focus points, resulting in an image with stunning details and sharpness. Through the use of bracketing, photographers are able to achieve more creative photographs with better exposure and detail.
Exposure bracketing is a great way to capture detailed photos with low ISO and high depth of field (DOF). The process involves taking a series of photos of the same scene, each with different exposure settings. This can be done by adjusting the shutter speed, or ISO. I do not recommend adjusting your F-stop.
For example, if you are shooting a landscape, you could use exposure bracketing to take photos with different shutter speeds and a small aperture (high f-stop). This will allow you to capture a photo with a large depth of field and a lot of detail, without increasing the ISO, which would add digital noise.
Exposure bracketing is a great technique for creating panoramic photos. This technique allows photographers to capture a wide range of details in a scene, from the shadows to the highlights. Here is a step-by-step guide to creating panoramas using exposure bracketing.
Using exposure bracketing is a great way to create panoramic photos with a wide range of details. With a bit of practice, you can use this technique to capture stunning landscape shots.
In conclusion, bracketing in photography is a powerful technique that can help you achieve the perfect exposure in those difficult situations. By taking multiple photos at different exposure levels, you can ensure you have a range of options to choose from, and can find the best one for the scene you’re shooting.
We hope this blog post has helped you understand what bracketing is and how to use it in your photography. Remember to experiment with different exposure levels and test out the techniques covered in this post to find which works best for you and the scene you’re photographing. The more you practice, the better you’ll get! So, get out there and start bracketing!

One of my favourite quick hikes near Cumberland is the Cumberland China Bowls, also known
Beginner landscape photography can feel overwhelming at first, but a few simple habits will improve

I’ve been to Browns River Falls many times, and it’s one of those places I